Introduction and Key Insights
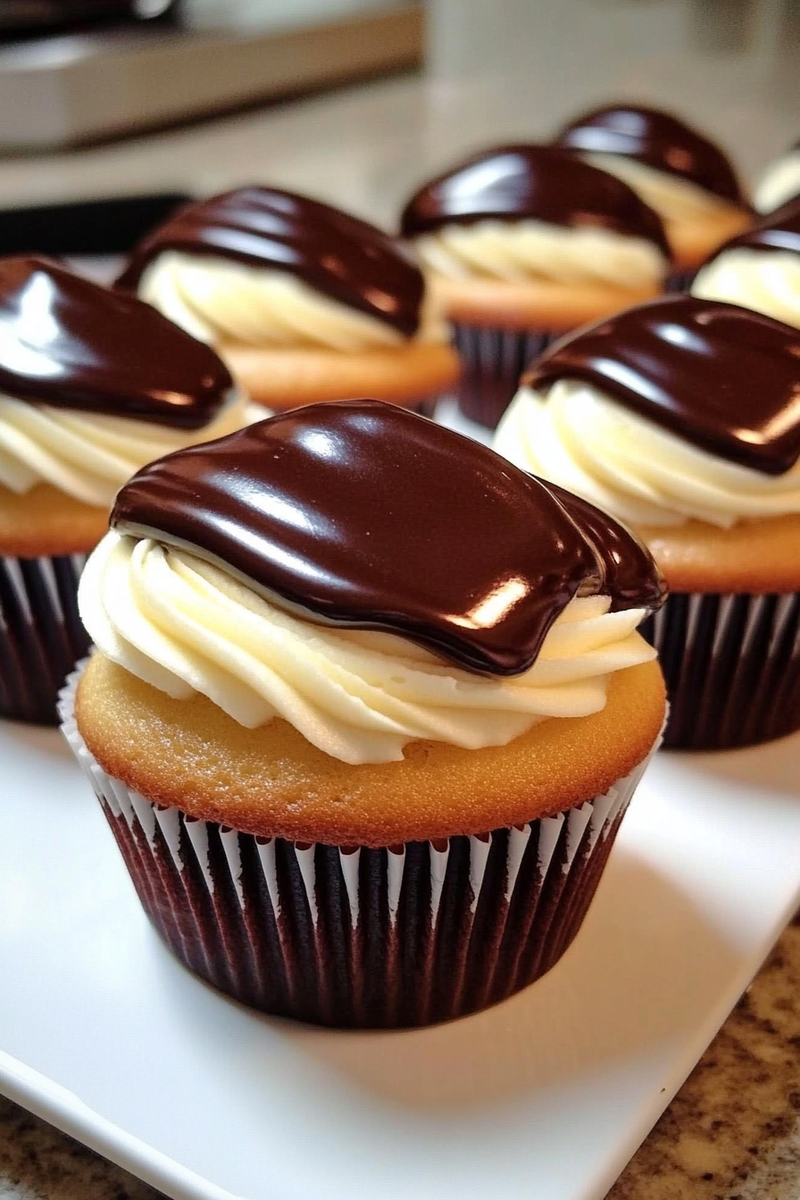
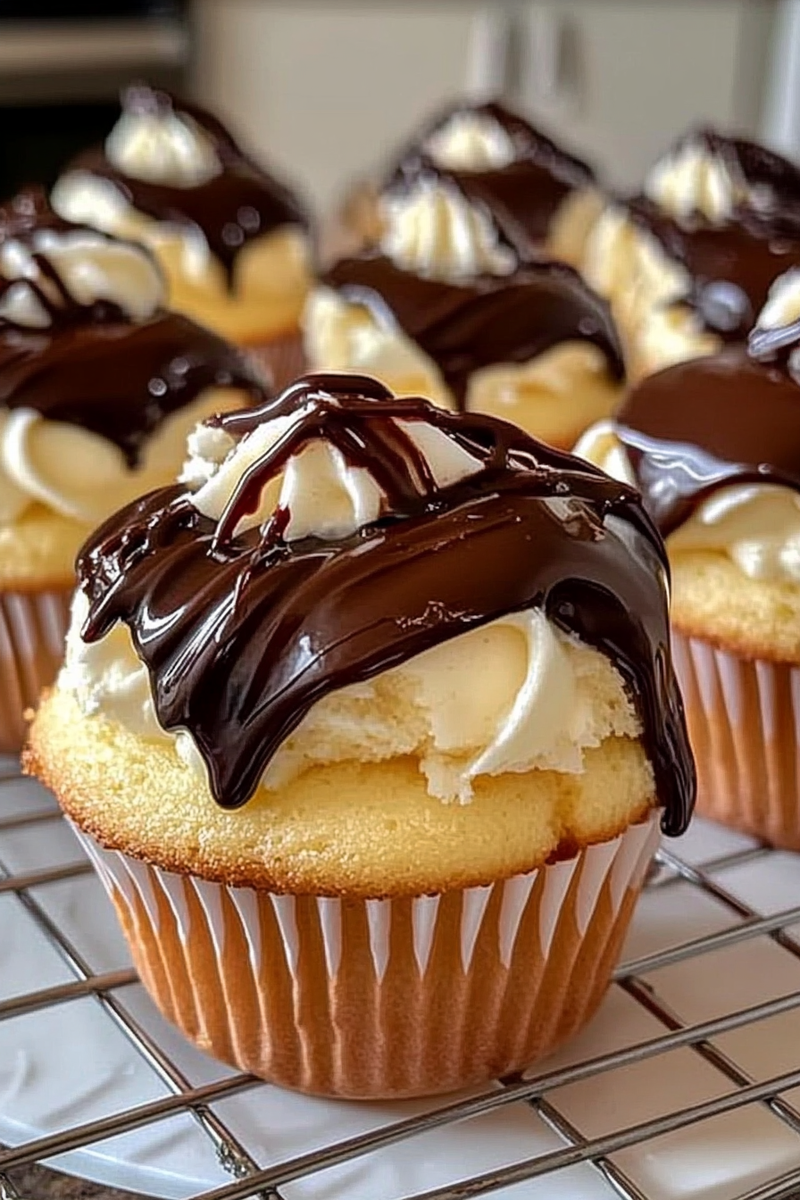
If you’re looking for a delightful twist on a classic dessert, look no further than Boston Cream Pie Cupcakes. These delectable treats combine the rich flavors of a traditional Boston cream pie with the convenience and charm of individual cupcakes. With fluffy vanilla cake infused with a luscious pastry cream filling and topped with smooth chocolate ganache, these cupcakes are perfect for any occasion. Whether you’re hosting a birthday party or simply want to satisfy your sweet tooth, these cupcakes will impress your guests and keep them coming back for more.
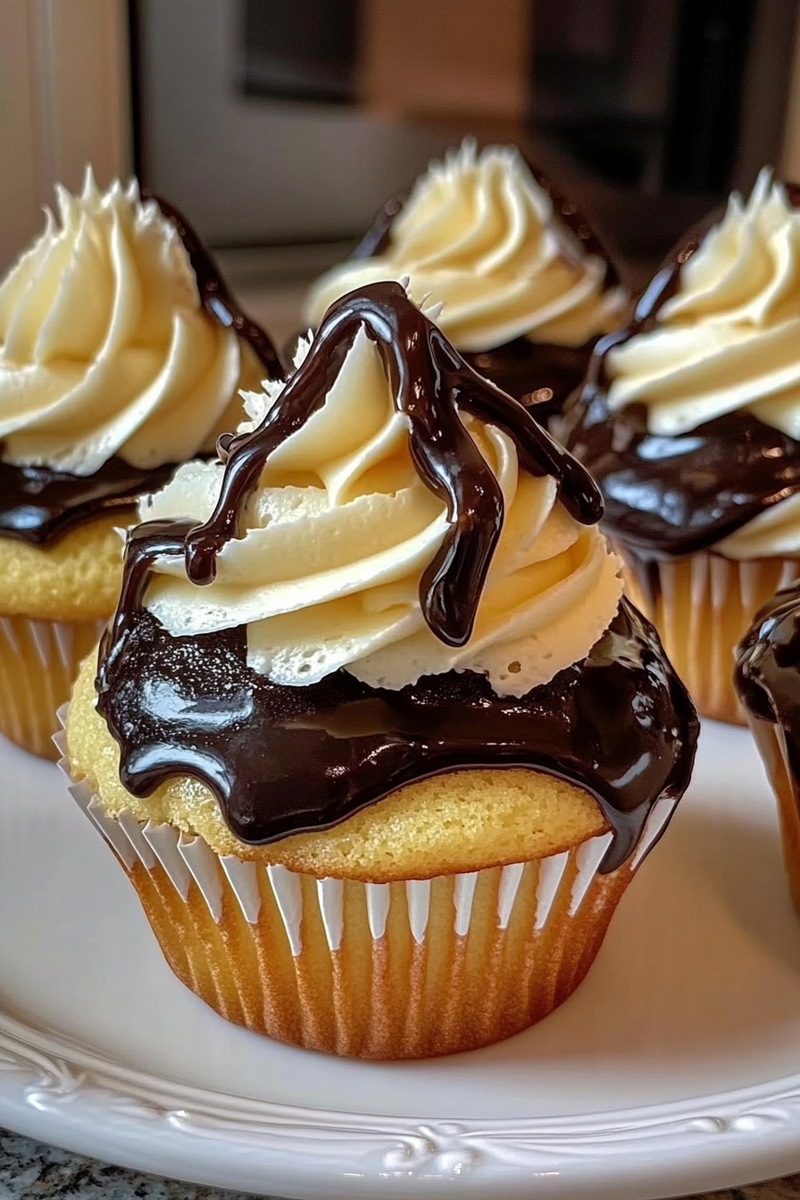
The beauty of these Boston Cream Pie Cupcakes is not just in their taste but also in their presentation. Each cupcake is a mini masterpiece that captures the essence of the classic pie. The combination of textures from the soft cake, creamy filling, and glossy chocolate topping creates an unforgettable experience. Plus, they are easier to serve than a traditional pie! In this article, we’ll dive deep into the ingredients you’ll need, provide step-by-step instructions for creating these mouthwatering delights, and offer tips on serving and storing them to ensure maximum freshness.
So roll up your sleeves and get ready to bake; soon you’ll have a platter full of irresistible Boston Cream Pie Cupcakes that will delight both your taste buds and those of your loved ones!
Ingredients Overview for Boston Cream Pie Cupcakes
Flour
For our cupcakes, we’ll need 1 ½ cups of all-purpose flour. This ingredient forms the base of our cupcake batter and provides structure. Using all-purpose flour strikes a balance between softness and sturdiness in our cakes.
Sugar
Using 1 cup of granulated sugar will give our cupcakes just the right amount of sweetness without overpowering other flavors. Sugar also contributes to the moistness of the cake while aiding in creating that beautiful golden-brown color during baking.
Baking Powder
To ensure our cupcakes rise perfectly, we will add 2 teaspoons of baking powder. This leavening agent is critical as it helps create air pockets within the batter when heated, resulting in light and fluffy cupcakes.
Salt
A pinch (about ½ teaspoon) of salt enhances all flavors in our recipe. Though it may seem counterintuitive to add salt to something sweet, it balances sweetness beautifully while enhancing overall flavor profiles.
Milk
For moisture and richness, we’ll need ½ cup of milk. Whole milk or buttermilk works best for achieving that velvety texture that we desire in our cupcakes.
Butter
Using ½ cup (1 stick) of unsalted butter adds richness to our batter while contributing to its tenderness. Be sure to let it soften at room temperature before mixing for optimal results.
Eggs
Two large eggs will help bind our ingredients together while providing additional moisture. Eggs also contribute to the overall structure and stability of our cupcake batter.
Pastry Cream
This is where we capture that classic Boston cream flavor! You’ll need approximately 1 cup of homemade or store-bought pastry cream as a filling for each cupcake.
Chocolate Ganache
Lastly, we will prepare 1 cup of chocolate ganache using semi-sweet chocolate chips combined with heavy cream. This luscious topping brings everything together beautifully; it’s what makes each bite truly decadent!
How to Prepare Boston Cream Pie Cupcakes
Step One: Prepare Your Oven And Muffin Tin
Start by preheating your oven to 350°F (175°C). While waiting for it to reach temperature, line your muffin tin with cupcake liners—this will prevent sticking while adding some flair! Make sure you have enough liners ready; this recipe typically yields about twelve standard-sized cupcakes.
Step Two: Mix Dry Ingredients
In one bowl, whisk together the flour, baking powder, and salt until evenly combined. This step ensures that each ingredient gets distributed well throughout the batter later on—an important factor in achieving consistent texture! Set this mixture aside as you prepare your wet ingredients.
Step Three: Combine Wet Ingredients
In another large mixing bowl—or using an electric mixer—cream together the softened butter and granulated sugar until light and fluffy (about 3-5 minutes). Next add one egg at a time while mixing well after each addition before pouring in half a cup milk gradually into this mixture until just combined—not too long though!
Step Four: Incorporate Dry Mixture
Now it’s time to incorporate those dry ingredients! Gradually fold them into your wet mix using either a spatula or wooden spoon until just combined—be cautious not overmix here; doing so can lead to dense cupcakes!
Step Five: Fill Muffin Tin
Spoon or pipe your batter evenly into each prepared liner—fill them about two-thirds full for optimal rising during baking! Place them directly into your preheated oven on the center rack then allow them bake undisturbed for around 18-20 minutes or until they spring back when touched lightly.
Step Six: Cool The Cupcakes
Once baked through (a toothpick inserted should come out clean), remove from oven then allow cooling in tin for about ten minutes before transferring them onto wire racks completely cool down before proceeding with pastry cream filling.
Step Seven: Make Pastry Cream Filling
While waiting on cooling time you can prepare homemade pastry cream if not using store-bought—combine milk over medium heat whisking constantly until hot but not boiling then temper yolks mixed separately with sugar & cornstarch—slowly pour hot mixture into egg mix stirring continuously return back onto heat stirring till thickened then chill completely before using!
Step Eight: Fill Each Cupcake
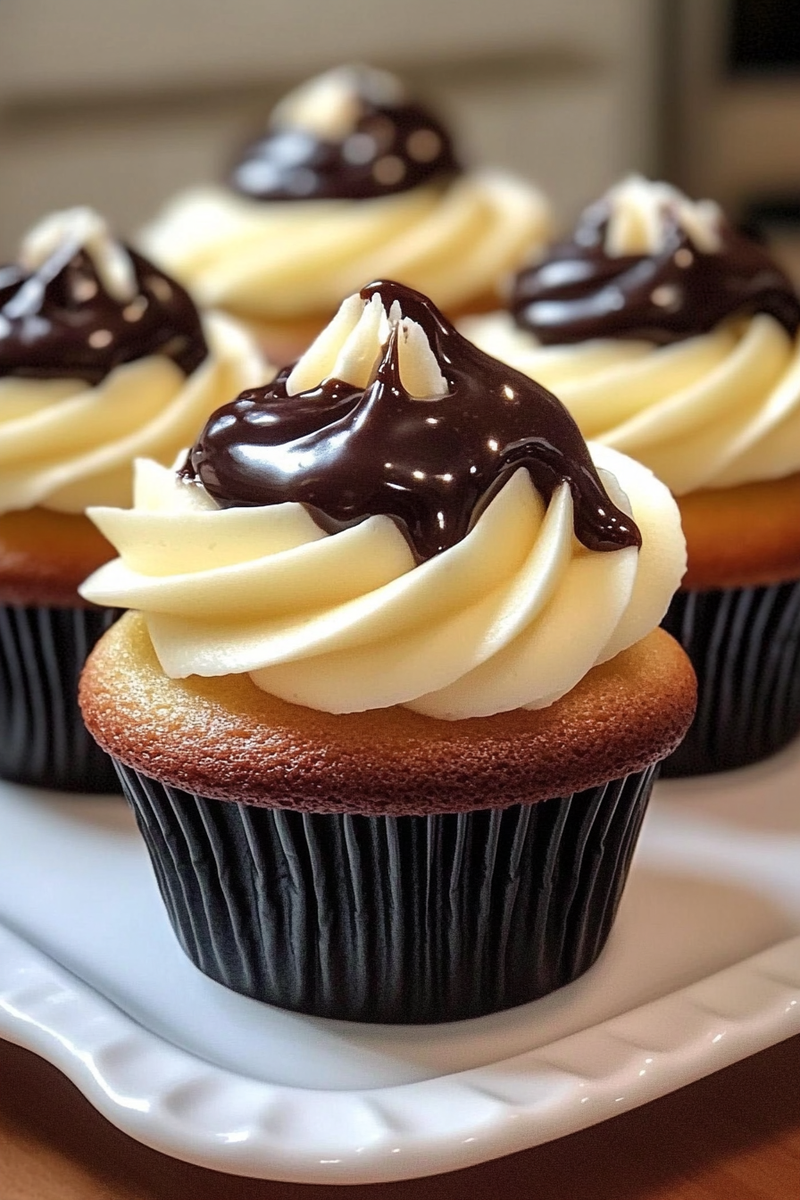
Once cooled down enough cut out small circles from tops off each cupcake gently creating space inside without damaging outer edges—using piping bag fill pastry cream generously so it peeks out slightly at tops resembling little volcanoes!
Step Nine: Prepare Chocolate Ganache Topping
To complete indulgence melt semi-sweet chocolate chips over double boiler or microwave then combine warm heavy cream whisking till smooth & glossy allowing cooling slightly before pouring over filled cupcakes ensuring even coating across surface area let set before serving!

Serving and Storing Tips
Serving Suggestions
These delightful Boston Cream Pie Cupcakes are best served slightly chilled after allowing them sit at room temperature briefly post-preparation—they maintain delicious moistness along with enhanced flavors when given time breathe beforehand! You can garnish each cupcake with fresh berries like strawberries or raspberries if desired adding vibrant color contrast against dark ganache finish making presentation pop even more appealing!
Additionally consider pairing these treats alongside coffee or tea during afternoon gatherings which highlights decadent sweetness beautifully balancing out richness found within buttery layers giving guests perfect opportunity enjoy every bite while sipping warm beverages!
Storing Leftovers Properly
If you find yourself with leftover cupcakes (though unlikely!), store them properly by placing inside airtight container stored refrigerator where they remain fresh up-to three days without losing quality—but be cautious not stack too high else risk crushing delicate frosting atop each one!
Before serving leftovers allow them come closer room temperature since flavors shine brighter once chilled effects dissipate slowly over time providing enjoyable experience every single time enjoyed later down road without compromising taste integrity overall!
Maintaining proper storage conditions ensures that you enjoy every last cupcake just as much as when they were first made—truly capturing essence behind why everyone loves indulging deliciously crafted desserts like these wonderful creations!
Mistakes to avoid
When making Boston Cream Pie Cupcakes, many common mistakes can lead to disappointing results. One frequent error is overmixing the batter. Overmixing incorporates too much air into the mixture, causing the cupcakes to rise unevenly and become dense. To avoid this, mix until just combined. The batter should still have some lumps.
Another mistake is neglecting to use room temperature ingredients. Ingredients like eggs and butter blend more effortlessly and create a smoother batter when they are at room temperature. Cold ingredients can lead to separation or uneven textures in your cupcakes.
Baking time is also critical. Many bakers check their cupcakes too early or leave them in the oven too long. Use a toothpick inserted into the center; if it comes out clean or with a few crumbs clinging, your cupcakes are done. Keeping an eye on them as they bake ensures that they don’t dry out.
Failing to cool the cupcakes properly before frosting is another common pitfall. If you frost warm cupcakes, the frosting will melt and slide off, creating a messy presentation. Allow your cupcakes to cool completely on a wire rack before adding any frosting.
Lastly, don’t skip chilling your pastry cream before filling the cupcakes. Warm pastry cream can ooze out when you bite into the cupcake, ruining the experience. Refrigerate it until it’s firm enough for easy piping.
Tips and tricks
To create perfect Boston Cream Pie Cupcakes, consider incorporating these helpful tips and tricks into your baking routine. Start by preparing all your ingredients in advance. This mise en place method allows for smoother preparation and ensures you won’t forget essential components like vanilla extract or baking powder.
When measuring flour, avoid packing it into your measuring cup as this can lead to using too much flour. Instead, spoon it into the cup and level it off with a knife for accurate measurement. Proper flour measurement is vital for achieving light and fluffy cupcakes.
For enhanced flavor, consider adding vanilla bean paste or using high-quality vanilla extract instead of artificial flavorings. This small change can significantly elevate the overall taste of your Boston Cream Pie Cupcakes.
Utilize an ice cream scoop for portioning cupcake batter evenly among muffin tins. This tool ensures that each cupcake bakes uniformly while also making the process quicker and cleaner.
Finally, practice patience when frosting your cooled cupcakes. Use a piping bag fitted with a star tip for an elegant finish that mimics traditional Boston Cream Pie aesthetics. A well-frosted cupcake not only tastes great but also looks professional and inviting.
Suggestions for Boston Cream Pie Cupcakes
For those looking to enhance their Boston Cream Pie Cupcakes experience, consider trying these suggestions during preparation and serving stages. A great starting point is experimenting with different types of chocolate ganache for topping your cupcakes. Dark chocolate, milk chocolate, or even white chocolate ganache can provide unique flavor profiles that complement your pastry cream filling beautifully.
Consider using flavored extracts in both the cake and filling for added depth. Almond extract adds warmth while citrus extracts can bring brightness to your dessert’s profile—perfectly balancing the sweetness of both frosting and cake layers.
If you’re hosting a gathering or party, serve these cupcakes on decorative platters with fresh fruit alongside them for color contrast and additional flavor options. Berries such as strawberries or raspberries pair wonderfully with chocolate desserts and offer a refreshing balance to their richness.
Additionally, think about creating mini versions of these delightful treats by using mini muffin tins instead of standard sizes; this allows guests to enjoy smaller portions without feeling guilty about indulging in dessert.
Lastly, always have extra pastry cream on hand! It makes for an excellent dip for fruits or cookies—a delicious way to showcase leftover ingredients rather than letting them go to waste.
FAQs
What is the origin of Boston Cream Pie Cupcakes?
Boston Cream Pie has its roots in New England history dating back to 1856 when French chef M.B. Gilbert created this layered dessert at the Parker House Hotel in Boston. Despite its name suggesting otherwise, it is actually a cake filled with pastry cream rather than a pie. The concept of turning this classic dessert into Boston Cream Pie Cupcakes emerged as bakers sought convenient ways to enjoy this beloved flavor combination in individual servings.
Can I make Boston Cream Pie Cupcakes ahead of time?
Yes! You can prepare various components of Boston Cream Pie Cupcakes ahead of time without compromising quality or taste. Bake the cupcake bases a day prior and store them in an airtight container at room temperature until ready to frost and assemble with pastry cream filling later on.
How do I store leftover Boston Cream Pie Cupcakes?
To maintain freshness after making these delightful treats, store any leftovers in an airtight container within the refrigerator due to their creamy filling and frosting components. They should be enjoyed within three days for optimal taste; however, they will last up to five days if necessary.
Can I substitute ingredients in my Boston Cream Pie Cupcakes recipe?
Absolutely! If you’re looking for healthier alternatives or have allergies/dietary restrictions, feel free to substitute certain ingredients while keeping proportions similar—for example, swap all-purpose flour with almond flour or gluten-free flour blends as desired without sacrificing texture too much!
What type of chocolate works best for ganache?
The choice between dark chocolate versus milk chocolate ganache depends on personal preference! Dark chocolate brings rich depth perfect against sweet vanilla pastry cream while milk chocolate gives a lighter sweetness appealing especially if serving younger audiences or those who prefer milder flavors overall—experimenting will help determine which suits your palate best!
How can I make my frosting more stable?
To achieve greater stability in your frosting while preparing these cupcakes, consider adding cornstarch into buttercream mixtures or utilizing high-fat creams like heavy whipping cream instead—both methods contribute additional structure that helps maintain shape during warmer temperatures ensuring every bite remains delightful!
Conclusion
In conclusion, mastering Boston Cream Pie Cupcakes requires attention to detail by avoiding common mistakes such as overmixing batter or neglecting ingredient temperatures—these pitfalls can detract from achieving delicious results! Implementing helpful tips like proper measuring techniques improves accuracy resulting in perfectly fluffy treats every time baked! Additionally exploring variations through substitutions opens up endless possibilities fueling creativity within baking endeavors!
With suggestions ranging from flavored extracts enhancing complexity down miniaturizing sizes catering events gives everyone access enjoyment individually tailored servings—each bite becomes a celebration! Answering frequently asked questions sheds light upon origins storage methods involving ingredient substitutions ensuring bakers feel empowered approach this timeless classic confidently regardless skill level! Happy baking!
PrintBoston Cream Pie Cupcakes
Indulge in a delightful twist on a classic dessert with these Boston Cream Pie Cupcakes. Each cupcake combines moist vanilla cake, rich custard filling, and a smooth chocolate glaze, offering a perfect bite-sized version of the beloved Boston Cream Pie.
- Prep Time: 30 minutes
- Cook Time: 20 minutes
- Total Time: 50 minutes
- Yield: 12 cupcakes 1x
- Diet: Vegetarian
Ingredients
- 1 cup all-purpose flour
- 1 tsp baking powder
- 1/4 tsp salt
- 1/2 cup unsalted butter, softened
- 3/4 cup granulated sugar
- 2 large eggs
- 1 tsp vanilla extract
- 1/2 cup milk
- 1 cup vanilla custard (store-bought or homemade)
- 1/2 cup chocolate ganache or chocolate glaze
Instructions
- Preheat your oven to 350°F (175°C) and line a muffin tin with cupcake liners.
- In a bowl, whisk together flour, baking powder, and salt.
- In another bowl, cream together butter and sugar until light and fluffy. Beat in eggs one at a time, then stir in vanilla extract.
- Gradually mix in the dry ingredients alternately with milk, starting and ending with the dry ingredients.
- Divide the batter evenly among the prepared cupcake liners, filling each about two-thirds full.
- Bake for 18-20 minutes or until a toothpick inserted into the center comes out clean.
- Let cupcakes cool completely, then use a small knife or cupcake corer to remove a piece from the center of each cupcake.
- Fill the hollowed centers with vanilla custard.
- Top each cupcake with chocolate ganache, spreading gently to cover the custard.
- Allow the chocolate to set before serving.
Notes
- Ensure all ingredients are at room temperature to achieve a smooth batter.
- For homemade custard, consider using a thickener like cornstarch to ensure it holds well within the cupcakes.
- If the chocolate ganache is too thick to spread, warm it slightly for a smoother consistency.

