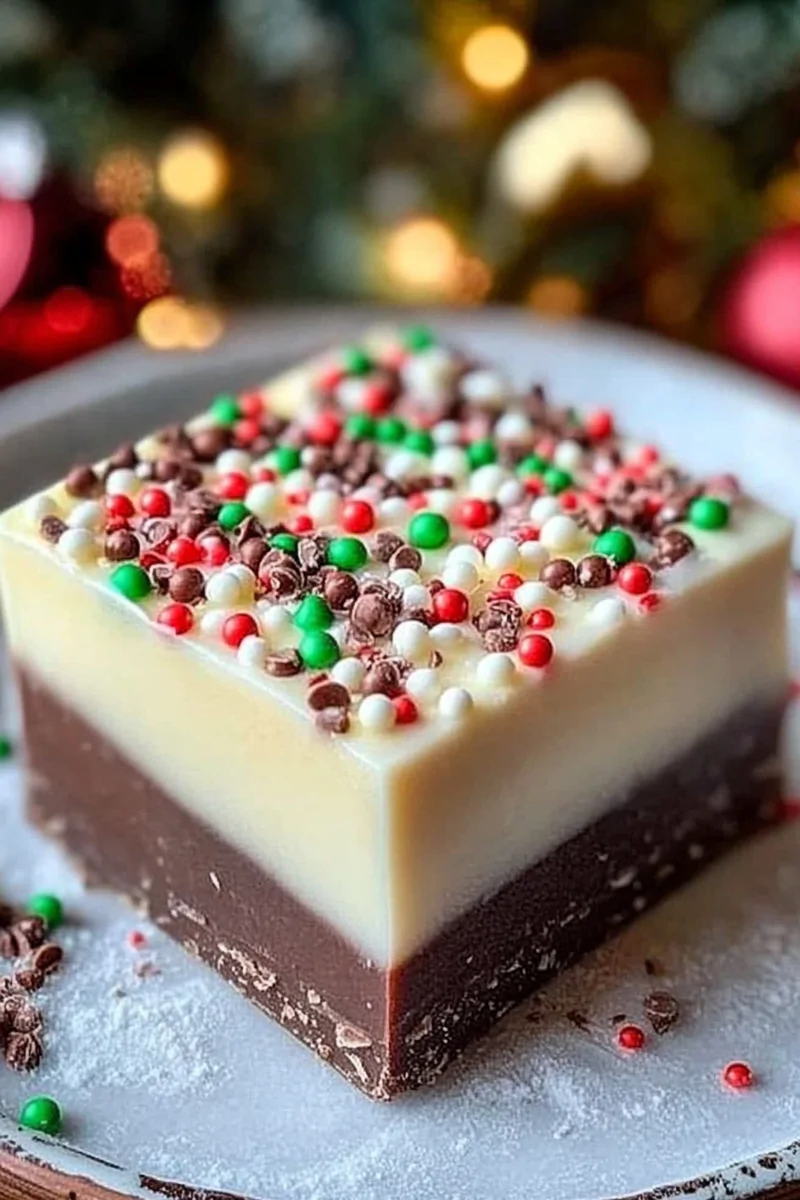
Introduction and Key Insights
The holiday season is a time of joy, family gatherings, and delicious treats. One of the most delightful sweets you can make is Magical Christmas Fudge. This decadent dessert is not only easy to prepare but also brings a sense of warmth and nostalgia that fills the air with festive cheer. Whether you are planning a holiday party or looking for the perfect gift to share with friends and family, this fudge recipe will surely impress.

In this article, we will explore the magic behind making the best **Magical Christmas Fudge**, guiding you through each step to ensure your creation turns out perfectly every time. With its rich texture and delightful flavors, this fudge is a crowd favorite that can be personalized in numerous ways. The combination of chocolate and various toppings makes it versatile enough to suit everyone’s taste.
Get ready to dive into the world of sweet delights as we break down the ingredients needed to create this luscious treat. We’ll also provide detailed preparation instructions alongside helpful serving and storing tips. By following our guide closely, you’ll soon have your own batch of **Magical Christmas Fudge** ready to spread joy during the holidays.
Ingredients Overview for Magical Christmas Fudge
Sweetened Condensed Milk
Sweetened condensed milk serves as the base for your Magical Christmas Fudge. This thick and creamy ingredient blends seamlessly with chocolate and other additions, ensuring a smooth texture. You’ll need one 14-ounce can for this recipe. The sweetness from the condensed milk balances perfectly with any bittersweet chocolate you use, enhancing overall flavor while contributing moisture that helps bind all components together.
Semi-Sweet Chocolate Chips
Semi-sweet chocolate chips are crucial in providing that rich chocolate flavor in your fudge. You’ll require two cups (about 12 ounces) for this recipe. They melt beautifully during preparation and solidify into a luscious texture upon cooling. Using quality semi-sweet chips will ensure your fudge has that delectable sweetness without being overly sugary.
Unsalted Butter
Unsalted butter brings richness to your Magical Christmas Fudge while adding creaminess to its texture. For this recipe, you will need one stick (or 1/2 cup) of unsalted butter. It’s essential to use unsalted butter so you can control the saltiness of your final product more accurately – allowing the sweet flavors of chocolate and condensed milk to shine through.
Vanilla Extract
A splash of vanilla extract elevates your fudge by adding depth to its flavor profile. You’ll need one teaspoon for this recipe. The aroma of vanilla complements chocolate beautifully while providing an inviting warmth that embraces holiday spirit.
Optional Toppings
Optional toppings such as chopped nuts (walnuts or pecans), crushed peppermint candies, or festive sprinkles add visual appeal and enhance flavor variety in your Magical Christmas Fudge. You can adjust these toppings based on personal preference; about one cup total should suffice if you’re including multiple options.

How to Prepare Magical Christmas Fudge
Step 1: Prepare Your Equipment
Before starting your magical journey into fudge-making, gather all necessary equipment for preparation. You’ll need a heavy-bottomed saucepan or double boiler for melting ingredients safely without scorching them. Have on hand a wooden spoon or silicone spatula for stirring throughout the process – these tools help combine ingredients thoroughly without scratching non-stick surfaces.
Additionally, line an 8×8 inch baking dish with parchment paper or aluminum foil before beginning; leaving some overhang on the edges allows for easier removal once chilled. Ensure you have measuring cups and spoons readily available—accurate measurements are critical in achieving perfect results!
Step 2: Melt Chocolate Mixture
Once all equipment is prepared, place your saucepan over low heat or set up a double boiler on medium-low heat; add in butter followed by semi-sweet chocolate chips along with sweetened condensed milk into it at once! Stir slowly until everything melts together into one smooth mixture; patience is key here—avoid high temperatures which may burn chocolate quickly! Continue stirring consistently until no lumps remain; you’ll know it’s ready when glossy consistency appears.
After achieving desired consistency remove from heat immediately! At this point add vanilla extract; mix well ensuring it’s fully incorporated throughout fudge batter before proceeding further!
Step 3: Pour Into Prepared Dish
Now comes an exciting moment—pouring that heavenly melted mixture into prepared baking dish! Use spatula gently scrape every last bit out ensuring none goes wasted! Spread evenly across bottom surface using spatula tip lightly pressing down so it sets nicely once cooled completely later on.
If you desire any optional toppings like crushed peppermint candies or chopped nuts now’s the time sprinkle them generously over top surface before placing into refrigerator! Allow at least two hours minimum cooling time—this ensures firm structure when slicing later!
Step 4: Slice & Enjoy
After waiting patiently while chilled properly remove from fridge – grasp those parchment paper edges carefully lift entire slab out onto cutting board set aside beforehand! Use sharp knife cut into squares evenly sized pieces—you’ll find it’s easier if warmed slightly under hot water first then dried off before cutting through fudgy goodness!
Serve immediately among loved ones during festivities or store leftovers properly sealed within airtight containers—enjoying them later during cozy nights ahead!

Serving and Storing Tips
Serving Suggestions
When serving your Magical Christmas Fudge, presentation plays a vital role in adding charm to gatherings! Cut them into uniform squares arrange neatly onto festive platters garnished with sprigs of mint leaves or tiny ornaments creating an inviting display sure impress guests alike! Pairing these treats alongside warm beverages like hot cocoa enhances experience—consider offering whipped cream topping too!
Another creative idea involves packaging individual pieces within small clear bags tied off with colorful ribbons as thoughtful gifts—perfect tokens showcasing love put forth during preparations! Additionally feel free customize flavors by experimenting different extracts combined various toppings—endless possibilities await discovery through creativity!
Storage Guidelines
Proper storage ensures longevity maintaining freshness delightful taste beyond initial serving days! Store leftover Magical Christmas Fudge inside an airtight container placed in cool dry area away from direct sunlight exposure; refrigerating extends shelf life up three weeks maximum without compromising quality however keep mind consistency may change slightly due cold environment making extra chewy!
For longer-term storage consider freezing individual slices wrapped tightly plastic wrap followed by aluminum foil preventing freezer burn retaining original flavors intact—these can last upwards several months enjoyable whenever cravings arise unexpectedly!
By following these simple serving and storing tips enjoy sweet moments created around table shared loved ones every occasion possible—the magic truly unfolds each bite savored together creating memories last lifetime cherished forevermore!
Mistakes to avoid
When making Magical Christmas Fudge, several common mistakes can lead to less-than-perfect results. Avoiding these pitfalls will ensure that your fudge turns out creamy, rich, and delicious.
One significant mistake is not using the right ingredients. High-quality chocolate is crucial for a smooth texture and rich flavor. Opt for real chocolate rather than chocolate chips or candy coatings, which can lead to a grainy consistency. Always use fresh ingredients, as expired products can alter the taste and texture of your fudge.
Another mistake is not measuring ingredients accurately. Baking is an exact science, so using precise measurements is essential. Too much or too little of any ingredient can throw off the balance. Invest in a good kitchen scale or measuring cups to ensure accuracy.
Cooking at the wrong temperature is another common error. If you cook your fudge mixture too fast or at too high a heat, it can scorch or seize up. Use low to medium heat and stir constantly to ensure even melting and cooking.
Additionally, don’t skip the cooling phase. Allowing your fudge to cool fully before cutting is vital for clean edges and a perfect texture. Cutting it too early can result in a messy presentation and uneven pieces.
Lastly, avoid overmixing your fudge once you’ve added the chocolate. Stirring too vigorously can introduce air bubbles into your mixture, leading to a less desirable texture. Gently fold the chocolate until just combined for the best results.

Tips and tricks
To create the best Magical Christmas Fudge possible, here are some helpful tips and tricks that will elevate your fudge-making game.
First, prepare your pan by lining it with parchment paper before pouring in the fudge mixture. This step will make it easier to lift the fudge out once it’s set. Additionally, leaving some overhang will allow you to cut clean pieces without worrying about sticking.
Incorporating flavors like peppermint extract or vanilla can enhance your fudge’s taste significantly. Be cautious with extract quantities; a little goes a long way! Start with a small amount and adjust according to your preference.
Using a candy thermometer can also be beneficial when making fudge. This tool ensures that you reach the correct temperature for sugar syrup formation, which helps achieve that perfect fudgy consistency. Aim for around 234°F (112°C) for soft-ball stage perfection.
Experimenting with mix-ins like nuts or dried fruit adds texture and flavor variety. Chopped walnuts or dried cranberries pair beautifully with chocolate and add festive flair to your Magical Christmas Fudge.
Lastly, store your fudge properly once it’s made. Keep it in an airtight container at room temperature for up to two weeks. If you want it to last longer, refrigerate it for up to three weeks or freeze it for later enjoyment.
Suggestions for Magical Christmas Fudge
When preparing Magical Christmas Fudge, consider these suggestions for enhancing both flavor and presentation.
Firstly, pairing different types of chocolate can create complex flavor profiles in your fudge. For instance, combining dark chocolate with white chocolate swirls offers an appealing contrast both visually and taste-wise. This technique adds depth while catering to various palates.
Consider adding toppings after pouring the fudge into your pan but before allowing it to set fully. Sprinkling crushed candy canes or festive sprinkles on top not only enhances flavor but also boosts visual appeal during holiday gatherings.
Selecting decorative packaging makes gifting homemade fudge more special during Christmas time. Use festive boxes or tins lined with colorful tissue paper for an elegant touch that showcases your delicious treats beautifully.
For those who enjoy experimenting with textures, creating layers in your Magical Christmas Fudge can be exciting! Pour half of the base mixture into the pan, let it set slightly before adding other flavors or colors on top, then finish with remaining base mixture—this creates beautiful layers that are visually striking when cut.
Lastly, sharing stories about how you developed this recipe or tradition around making Magical Christmas Fudge can make serving even more meaningful during holiday celebrations!

FAQs
What type of chocolate should I use for Magical Christmas Fudge?
When making Magical Christmas Fudge, using high-quality chocolate is essential for achieving a rich flavor and smooth texture. Opt for semi-sweet or dark chocolate bars instead of chips or candies that may contain additives affecting both taste and consistency. Look for brands that list cocoa content above 50% for optimal richness—this makes all the difference!
Can I add other flavors to my Magical Christmas Fudge?
Absolutely! Experimenting with flavors elevates your Magical Christmas Fudge experience immensely! Consider incorporating extracts like peppermint or almond alongside traditional vanilla extract; just remember that extracts are potent—start small! Additionally, flavored liqueurs such as rum or coffee complement chocolate beautifully—a delightful twist indeed!
How should I store my Magical Christmas Fudge?
Store any leftover Magical Christmas Fudge in an airtight container at room temperature if consumed within two weeks; otherwise refrigerate them safely! For longer preservation periods (upwards of three weeks), freezing works well—just wrap individual pieces separately before placing them into freezer bags labeled clearly so they’re easy to find later!
How do I know when my fudge has reached the right consistency?
To achieve perfect consistency while making Magical Christmas Fudge requires careful monitoring during cooking! Utilize a candy thermometer; aim ideally between 234°F (112°C) – this indicates soft-ball stage ideal conditions! Alternatively test by dropping spoonfuls into cold water—if they form soft balls without spreading out excessively—they’re ready!
Can I make nut-free versions of Magical Christmas Fudge?
Yes! Making nut-free versions of Magical Christmas Fudge is entirely possible by simply omitting any nuts from recipes altogether—feel free also substitute nut-based products like almond milk with dairy alternatives such as soy milk instead! Enjoy customizing flavors just as much without compromising safety concerns regarding allergies!
Is there a vegan option available for this recipe?
Certainly! To create vegan-friendly Magical Christmas Fudge use plant-based chocolates along with non-dairy milk substitutes like coconut cream instead of heavy cream traditionally used in conventional recipes—ensure all other ingredients adhere strictly under vegan guidelines too! The result remains indulgent yet aligns perfectly within dietary preferences!
Conclusion
Creating magical experiences during holiday seasons comes naturally when indulging in delightful treats like Magical Christmas Fudge! By avoiding common mistakes such as inaccurate measurements or improper heating techniques ensures successful outcomes every time you whip up this classic treat!
Remember simple tips—like lining pans beforehand—and incorporating exciting flavors help elevate standard offerings into extraordinary delights worthy of sharing at gatherings throughout festive times ahead!
Keep practicing these suggestions while exploring new combinations when crafting this beloved confectionary delight—it truly embodies warmth reminiscent of cherished memories spent together during holidays—all culminating beautifully within each bite savored lovingly by friends & family alike this season!
PrintMagical Christmas Fudge Recipe for the Holidays
Make the holidays extra special with Magical Christmas Fudge! This rich, creamy fudge is the perfect festive treat, combining decadent chocolate with a sprinkle of holiday magic. Swirled with vibrant red and green accents and topped with festive sprinkles, this no-bake dessert is as delightful to look at as it is to eat. Perfect for gift-giving, parties, or a cozy night by the fire, this fudge is sure to bring cheer to your celebrations.
- Prep Time: 10 minutes
- Cook Time: 2 hours
- Total Time: 2 hours 10 minutes
- Yield: 16 squares 1x
- Category: Desserts
- Method: No-Bake
- Cuisine: American
- Diet: Vegetarian
Ingredients
- 3 cups semi-sweet chocolate chips
- 1 (14 oz) can sweetened condensed milk
- 1 tsp vanilla extract
- ½ tsp salt
- Red and green food coloring gel
- Festive sprinkles for topping
Instructions
1️⃣ Melt the Chocolate:
In a medium saucepan, combine the chocolate chips and sweetened condensed milk. Cook over low heat, stirring constantly, until the chocolate is completely melted and smooth.
2️⃣ Add Flavoring:
Remove the saucepan from heat and stir in vanilla extract and salt. Mix well.
3️⃣ Create the Swirls:
Divide the mixture into three portions. Leave one portion plain and mix red food coloring into the second portion and green food coloring into the third.
4️⃣ Assemble the Fudge:
Line an 8×8-inch baking pan with parchment paper. Spoon the plain, red, and green mixtures into the pan in dollops. Use a knife or toothpick to gently swirl the colors together to create a marbled effect.
5️⃣ Decorate:
Sprinkle festive sprinkles evenly over the top of the fudge. Gently press them into the surface to stick.
6️⃣ Chill and Set:
Refrigerate for at least 2 hours or until firm. Once set, lift the fudge out of the pan using the parchment paper and cut into squares.
Notes
- Use white chocolate chips instead of semi-sweet for a different flavor.
- Store fudge in an airtight container in the refrigerator for up to 1 week.
Keywords: magical Christmas fudge, holiday fudge recipe, festive fudge


