Introduction and Key Insights
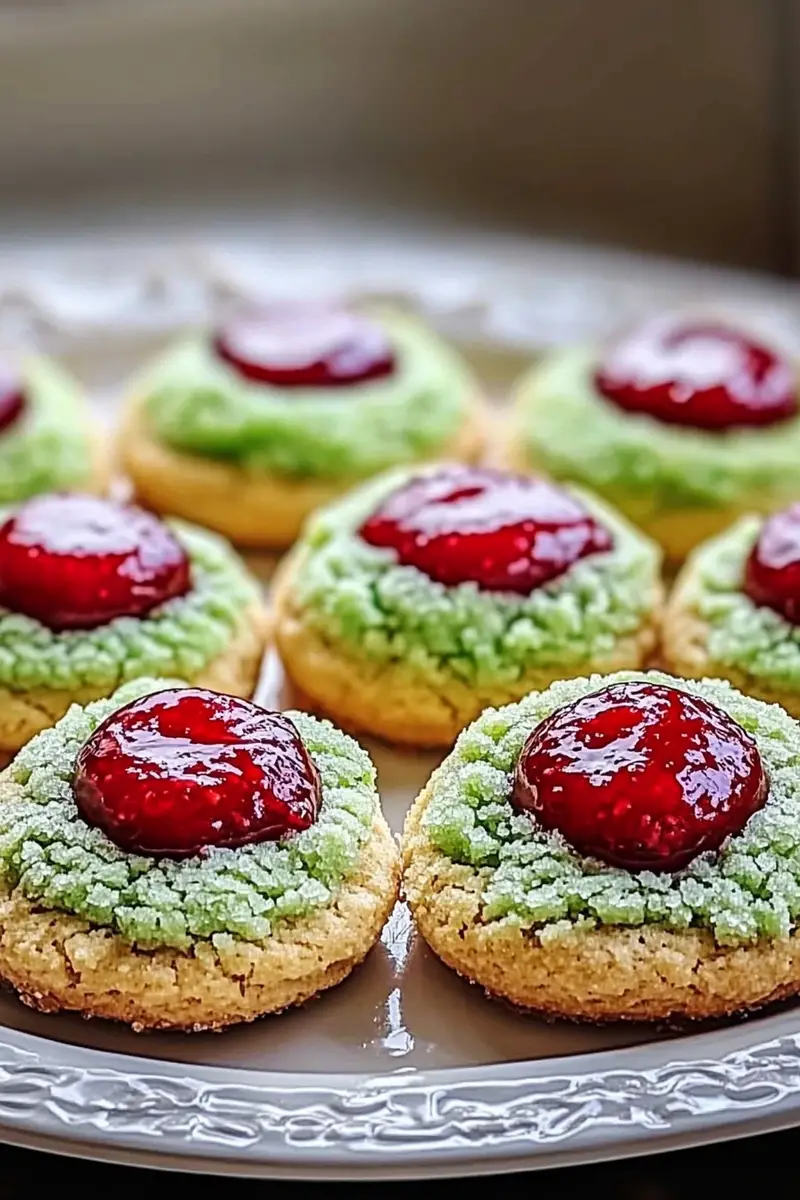
Cherry Pistachio Thumbprint Cookies are a delightful twist on the classic thumbprint cookie. Not only do they look stunning with their vibrant colors, but they also tantalize your taste buds with a perfect blend of nutty and sweet flavors. Imagine biting into a buttery cookie that crumbles in your mouth, releasing the flavors of roasted pistachios paired with a luscious cherry center. These cookies are perfect for any occasion—from holiday gatherings to afternoon tea—and they’re surprisingly simple to prepare.

The beauty of these Cherry Pistachio Thumbprint Cookies lies in their versatility. You can use homemade or store-bought cherry jam, allowing you to customize the sweetness and tartness to your liking. Adding finely chopped pistachios not only enhances the flavor but also adds a lovely crunch that contrasts beautifully with the soft texture of the cookie. Plus, they make an excellent gift during the festive season or as part of a dessert platter at parties.
In this article, you will find everything you need to know about creating these delicious cookies at home. We’ll cover ingredient details, step-by-step preparation instructions, and tips for serving and storing your creations. Let’s dive into this delightful baking adventure!
Ingredients Overview for Cherry Pistachio Thumbprint Cookies
All-Purpose Flour
All-purpose flour serves as the foundation for your Cherry Pistachio Thumbprint Cookies. With its balanced protein content, it provides the right structure while ensuring the cookies remain tender and crumbly. For this recipe, you will need 2 cups of all-purpose flour. Sift it before measuring to ensure accuracy and prevent clumping.
Unsalted Butter
Unsalted butter adds richness and flavor to your cookies. Using unsalted butter allows you to control the overall saltiness of the dough. You will need 1 cup (2 sticks) of softened unsalted butter. Make sure it’s at room temperature for easier mixing with sugar.
Granulated Sugar
Granulated sugar is essential for sweetness and contributes to the cookie’s texture by helping to create a tender crumb. For this recipe, you’ll require 3/4 cup of granulated sugar. Be sure to cream it well with the butter until light and fluffy for best results.
Brown Sugar
Brown sugar adds moisture and a hint of caramel flavor due to its molasses content. Use 1/4 cup of packed brown sugar in this recipe for an extra layer of depth in flavor.
Egg Yolks
Egg yolks provide richness and act as a binding agent in your cookie dough. You’ll need 2 large egg yolks for this recipe; be careful not to include any egg whites as they can alter the texture of your cookies.
Vanilla Extract
Vanilla extract enhances all other flavors in your Cherry Pistachio Thumbprint Cookies. You’ll need 1 teaspoon of pure vanilla extract for its aromatic qualities that elevate the overall taste profile.
Chopped Pistachios
Chopped pistachios bring a delightful crunch and unique flavor contrast against the sweet cherry filling. Use 3/4 cup of finely chopped unsalted pistachios; make sure they are fresh for maximum taste.
Cherry Jam
Cherry jam is what makes these thumbprints so special! It adds sweetness and tartness that beautifully complements the nutty flavor of pistachios. You will need about 1/2 cup of quality cherry jam—feel free to use homemade or store-bought based on your preference.

How to Prepare Cherry Pistachio Thumbprint Cookies
Step 1: Preheat Your Oven
Begin by preheating your oven to 350°F (175°C). This ensures that your cookies bake evenly from start to finish. While waiting for the oven to reach temperature, line two baking sheets with parchment paper or silicone baking mats—this prevents sticking and makes cleanup easier later on.
Step 2: Cream Butter and Sugars
In a large mixing bowl, combine softened unsalted butter with both granulated sugar and brown sugar using an electric mixer on medium speed until light and fluffy—about 3-4 minutes should suffice. Scrape down the sides occasionally with a spatula to ensure even mixing. The consistency should be pale yellow and airy by this point—this step is crucial as it incorporates air into the mixture which helps achieve lighter cookies.
Step 3: Add Egg Yolks and Vanilla
Once your butter-sugar mixture is fluffy enough, add in two egg yolks along with one teaspoon of pure vanilla extract. Beat them together until fully incorporated; you’re aiming for a smooth consistency without lumps remaining from the egg yolks or butter.
Step 4: Mix Dry Ingredients
In another bowl, whisk together two cups of all-purpose flour along with any desired spices or salt (if using). Gradually incorporate these dry ingredients into your wet mixture using low speed on your mixer; mix just until no streaks remain visible—overmixing could lead to tough cookies!
Step 5: Chill Your Dough
Once combined, cover your bowl tightly with plastic wrap or transfer it into an airtight container before chilling in the refrigerator for at least one hour—this firms up the dough making it easier to handle later when forming thumbprints.
Step 6: Shape Your Cookies
After chilling time is complete (and once preheated), scoop out tablespoon-sized portions from chilled dough and roll them into balls between your palms; place them onto prepared baking sheets spaced about two inches apart since they’ll spread while baking.
Using your thumb (or another utensil), gently press down in each ball’s center creating an indentation where you’ll later fill them with cherry jam—that’s why they’re called thumbprints!
Step 7: Fill With Jam Before Baking
Now comes one of my favorite parts! Use about half a teaspoon of cherry jam per cookie indentation—fill each thumbprint generously but avoid overflowing since that could create messy results once baked!
Step 8: Bake Your Cookies
Place both trays into preheated oven allowing them room for expansion during baking time which usually takes around 12-15 minutes until edges turn lightly golden brown while centers remain soft but set up nicely!
Let cool on sheets briefly before transferring onto wire racks completely cool down—you don’t want those warm gooey centers melting away!

Serving and Storing Tips
Serving Suggestions
Once cooled completely after baking process has finished—the fun part begins! Serve these beautiful Cherry Pistachio Thumbprint Cookies fresh alongside coffee or tea during gatherings! They also work wonderfully displayed on dessert platters during parties where guests can easily grab one (or more!) as they mingle around enjoying each other’s company!
Feel free experimenting by dusting powdered sugar over tops prior serving especially if aiming impressively chic presentation—your guests will love both aesthetics & flavors!
Storage Instructions
To maintain freshness longer term beyond their initial serving window—ensure leftovers get stored properly! Place cooled cookies into an airtight container layered between sheets parchment paper preventing them sticking together while protecting delicate toppings too!
These cookies stay deliciously soft at room temperature lasting up five days typically if kept sealed tight enough away from direct sunlight which could dry them out excessively quickly! Alternatively refrigerating keeps them fresher longer if desired though might slightly alter original texture making less tender than fresh baked batch enjoyed right away!
Enjoy each bite knowing you’ve crafted something truly special that’s guaranteed delight every time shared among friends & family alike!
Mistakes to avoid
One common mistake when making Cherry Pistachio Thumbprint Cookies is overworking the dough. When you mix the ingredients, aim for just combined. Overmixing can lead to tough cookies instead of the soft and tender texture that you desire. To avoid this, use a gentle folding motion once you add the dry ingredients to the wet ones. This ensures that the gluten doesn’t develop too much, keeping your cookies light and crisp.
Another frequent error is not chilling the dough before baking. Chilling helps solidify the fats in the dough, which results in thicker cookies that hold their shape during baking. If you’re short on time, at least let your dough rest for 30 minutes in the fridge. This step not only improves texture but also enhances flavor as it allows the ingredients to meld together.
Using stale or low-quality nuts is also a mistake that can easily be overlooked. Always opt for fresh pistachios to ensure maximum flavor and crunch. Nuts can go rancid quickly, so check their expiration date and smell them before using. Toasting them lightly can amplify their flavor even more, adding an extra depth to your Cherry Pistachio Thumbprint Cookies.
Lastly, neglecting to preheat your oven properly can ruin your baking experience. An oven that hasn’t reached the right temperature will affect how your cookies bake, leading to uneven results. Invest in an oven thermometer if you’re unsure about your oven’s accuracy, ensuring that it’s set correctly before placing your cookies inside.

Tips and tricks
When preparing Cherry Pistachio Thumbprint Cookies, start with quality ingredients for the best results. Use unsalted butter that is softened at room temperature for a creamy texture. This allows for easier incorporation of sugar and other ingredients and helps achieve a smooth dough consistency. Additionally, consider using organic cherries if possible; they often provide superior flavor compared to conventional options.
One essential tip is to create uniform cookie shapes for even baking. Use a cookie scoop or tablespoon to portion out your dough evenly. This helps maintain consistent size and ensures they all bake at the same rate. After forming each ball, gently press your thumb into the center; this creates room for filling later on without compromising structural integrity.
Experiment with fillings beyond traditional jam by incorporating different flavors like chocolate ganache or citrus curd into your thumbprints. Mixing sweet cherry preserves with a hint of almond extract can elevate your cookies’ flavor profile significantly. Just remember not to overfill; too much filling may spill over during baking.
Lastly, always allow your cookies to cool on a wire rack after baking. Cooling them on parchment paper may trap steam underneath, resulting in soggy bottoms instead of crispy edges and chewy centers. A wire rack promotes airflow around each cookie and maintains their ideal texture until they’re ready to be enjoyed.
Suggestions for Cherry Pistachio Thumbprint Cookies
To enhance your Cherry Pistachio Thumbprint Cookies even further, consider adding a pinch of sea salt on top before baking. This simple addition elevates sweetness by balancing flavors beautifully and brings out rich nutty undertones from the pistachios.
If you’re looking for dietary alternatives, try substituting almond flour for all-purpose flour for a gluten-free version of these delicious treats. The almond flour provides both structure and moisture while complementing the pistachio flavor beautifully—perfectly aligning with those nutty notes throughout every bite.
Incorporating spices like cardamom or cinnamon into your dough offers an exciting twist on traditional flavors while harmonizing well with cherries and pistachios alike! These spices add warmth without overpowering existing tastes—the perfect way to impress guests during festive occasions or family gatherings!
For those who prefer more visual appeal in baked goods, consider rolling half of each cookie ball in chopped pistachios before baking! This not only adds texture but makes them visually striking as well! Plus, it increases nutty goodness per bite—it’s a win-win situation!

FAQs
What are Cherry Pistachio Thumbprint Cookies?
Cherry Pistachio Thumbprint Cookies are delightful treats featuring a buttery base enriched with crushed pistachios and filled with cherry preserves or jam at their centers. Their unique combination creates chewy yet crisp cookies bursting with fruity flavors complemented by nutty undertones from pistachios.
How do I store leftover cookies?
For optimal freshness after baking Cherry Pistachio Thumbprint Cookies, store them in an airtight container at room temperature for up to five days. If you need longer storage time, consider freezing them; place cooled cookies between layers of parchment paper in freezer-safe bags or containers—this prevents sticking while preserving taste!
Can I use other nuts instead of pistachios?
Absolutely! While pistachios offer distinct flavor profiles that pair beautifully with cherries, feel free to experiment using different nuts like almonds or walnuts as substitutes based on personal preference! Just ensure they’re finely chopped before incorporating them into your dough mixture.
Can these cookies be made ahead of time?
Yes! You can prepare Cherry Pistachio Thumbprint Cookie dough ahead of time and refrigerate it for up to three days before baking—perfect if you’re planning ahead for gatherings or events! Alternatively, freeze unbaked cookie balls wrapped tightly in plastic wrap; when ready to bake them off later on—thaw slightly before proceeding directly onto parchment-lined trays!
What type of cherry preserves should I use?
When selecting cherry preserves for these thumbprints—it’s best to opt for high-quality varieties made from real fruit rather than artificial flavors! Look out for brands marked as “all-natural” without added preservatives or excessive sugars—they provide authentic taste ensuring each bite bursts forth true fruitiness enriching every mouthful!
Are these cookies suitable for special diets?
If dietary restrictions apply—Cherry Pistachio Thumbprint Cookies can be customized accordingly! Gluten-free versions utilizing almond flour instead of regular flour exist alongside vegan adaptations by swapping butter with coconut oil or margarine while using flax eggs (flaxseed meal mixed into water) instead of chicken eggs—making delightful alternatives catering diverse preferences!
Conclusion
Cherry Pistachio Thumbprint Cookies are not only delicious but also versatile treats perfect for any occasion—from holiday gatherings to casual get-togethers with friends over coffee! By avoiding common mistakes like overworking dough or skipping cooling times while following essential tips such as using quality ingredients—you’ll ensure every batch turns out perfectly every time!
Explore creative suggestions by experimenting with fillings beyond traditional jams or incorporating spices into your cookie base offering variety while tantalizing taste buds further elevating this classic dessert experience overall! With proper storage techniques extending their shelf life means enjoying these delectable bites long after they’ve been baked fresh!
Embrace all these techniques today and indulge yourself along others—you’re bound to impress everyone around you serving freshly baked Cherry Pistachio Thumbprint Cookies they’ll crave again soon after savoring just one bite!
Cherry Pistachio Thumbprint Cookies
Indulge in the classic charm of soft and chewy chocolate chip cookies, a family-favorite treat perfect for any occasion. These cookies are loaded with gooey chocolate chunks and made with simple pantry staples. Whether you enjoy them fresh out of the oven or cooled with a glass of milk, they promise to satisfy your sweet tooth.
- Prep Time: 15 minutes
- Cook Time: 12 minutes
- Total Time: 27 minutes
- Yield: 24 cookies 1x
- Category: Desserts
- Method: Baking
Ingredients
- 1 cup (226g) unsalted butter, softened
- 1 cup (200g) granulated sugar
- 1 cup (220g) brown sugar, packed
- 2 large eggs
- 2 tsp vanilla extract
- 3 cups (375g) all-purpose flour
- 1 tsp baking soda
- 1/2 tsp salt
- 2 cups (340g) semi-sweet chocolate chips
Instructions
- Preheat the oven to 350°F (175°C) and line baking sheets with parchment paper.
- In a large mixing bowl, cream together the butter, granulated sugar, and brown sugar until fluffy.
- Beat in the eggs one at a time, then add the vanilla extract.
- In a separate bowl, whisk together the flour, baking soda, and salt. Gradually mix into the wet ingredients.
- Fold in the chocolate chips.
- Scoop the dough onto the prepared baking sheets, spacing 2 inches apart.
- Bake for 10-12 minutes or until the edges are lightly golden. Let cool before serving.
Notes
- For crispier cookies, bake an additional 2 minutes.
- Add a pinch of sea salt on top for extra flavor.
Keywords: chocolate chip cookies, cookie recipe, homemade cookies


