Introduction and Key Insights
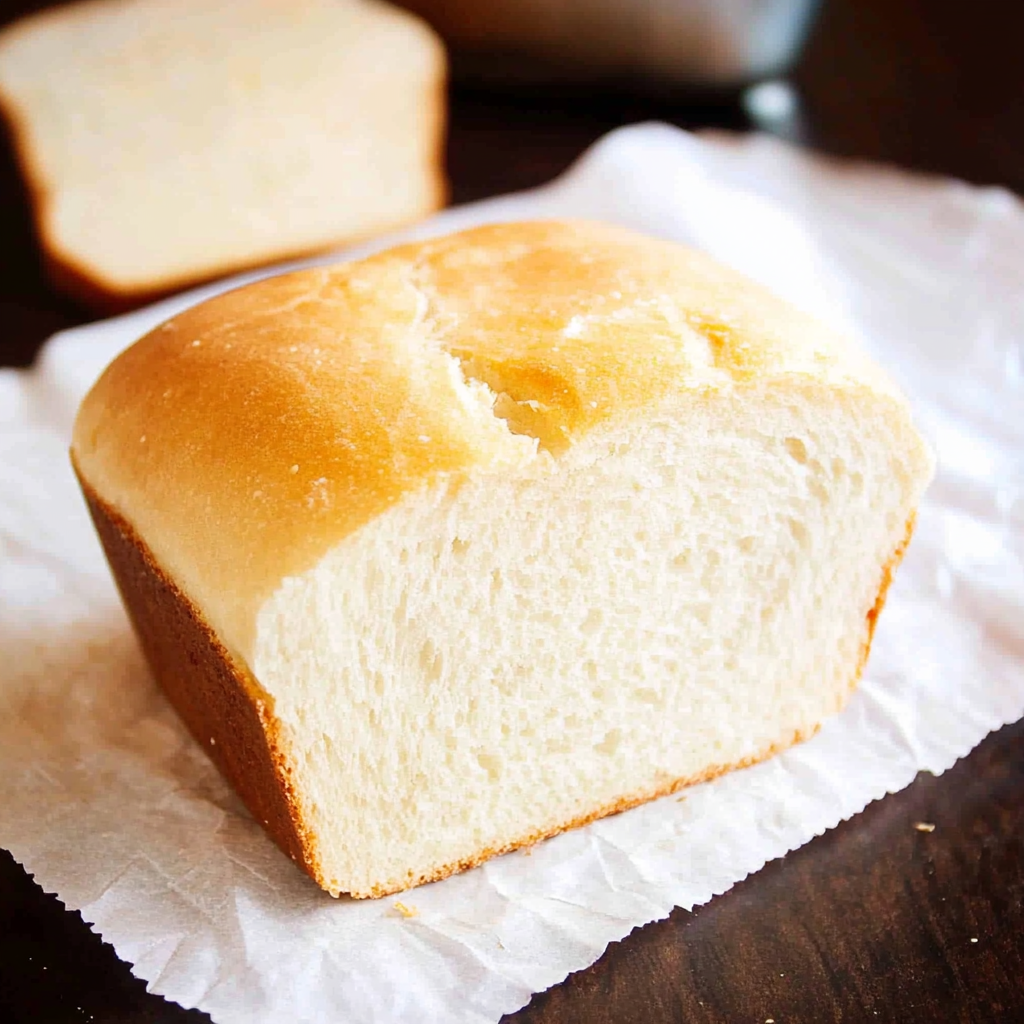
Amish White Bread is a delightful treat that brings warmth and comfort to any kitchen. This classic recipe is not only simple but results in a loaf that is soft, fluffy, and perfect for sandwiches or toasting. The beauty of this bread lies in its straightforward ingredients and the love poured into its preparation. With just a few pantry staples, you can create something truly special that your family will adore.

The origins of Amish White Bread date back to the Pennsylvania Dutch community, where home-baked goods were a staple of daily life. This tradition endures today as families gather around the table to share meals made with love. Whether you are a seasoned baker or just starting out, this recipe offers an accessible way to enjoy homemade bread without the need for specialized equipment.
In this article, you will find detailed instructions on crafting your own batch of Amish White Bread from scratch. We will cover everything from ingredient selection to preparation techniques and even tips for serving and storing your freshly baked loaf. By the end of this guide, you will have the confidence to whip up a delicious loaf of Amish White Bread that is sure to impress your family and friends.
Ingredients Overview for Amish White Bread
Flour
Flour serves as the backbone of any bread recipe, providing structure and texture. For our Amish White Bread, all-purpose flour is ideal as it contains enough gluten to give the bread its soft texture without being overly dense. You will need approximately 5 to 6 cups of all-purpose flour for this recipe. Be sure to measure accurately by spooning the flour into your measuring cup rather than scooping directly from the bag.
Sugar
Sugar not only adds sweetness but also helps activate yeast during the fermentation process. For this recipe, granular sugar works best; about 1/4 cup should suffice. This amount enhances flavor while ensuring that your bread rises beautifully without becoming overly sweet.
Yeast
Yeast is essential for leavening our dough. Active dry yeast or instant yeast can both be used; however, instant yeast allows for quicker preparation since it does not require proofing before use. You will need approximately 2 1/4 teaspoons (one packet) of yeast for our recipe.
Salt
Salt plays a crucial role in enhancing flavor while controlling yeast activity during fermentation. Use about 2 teaspoons of salt in your dough mixture; this ensures balanced taste without overpowering other flavors.
Milk
Milk enriches the dough with fats which contribute to its softness and moisture retention after baking. Whole milk provides the best results; aim for about 1 1/2 cups at room temperature when mixing with other ingredients.
Butter
Butter adds richness and flavor while keeping our bread tender. Unsalted butter is preferred so you can control the salt level in your dough better; use about 1/4 cup melted butter in your mix.

How to Prepare Amish White Bread
Step 1: Prepare Your Ingredients
Start by gathering all your ingredients on a clean countertop or workspace. Measure out your flour, sugar, salt, yeast, milk, and butter precisely as outlined above. It’s important that everything is ready before you begin mixing—this ensures a smooth process and helps prevent mistakes along the way.
Step 2: Activate Yeast
In a large mixing bowl or stand mixer fitted with a dough hook attachment, combine warm milk (about 110°F), sugar (1 tablespoon), and yeast (2 1/4 teaspoons). Stir gently until combined then let it sit for about 5-10 minutes until frothy bubbles form on top—this indicates that the yeast is activated and ready to work its magic.
Step 3: Combine Dry Ingredients
In another bowl, whisk together 4 cups of all-purpose flour with salt (2 teaspoons). Gradually add this mixture into the activated yeast mixture while mixing on low speed if using a stand mixer or stirring by hand if doing it manually. Continue adding flour until it begins forming a shaggy dough.
Step 4: Knead The Dough
Once combined well enough not to stick too much on your fingers anymore (you may need an additional cup), transfer everything onto a floured surface or keep it in the mixing bowl if using a stand mixer equipped with kneading hooks; knead vigorously for about 8-10 minutes until smooth elastic texture develops—a sign that gluten has formed nicely!
Step 5: First Rise
Shape your kneaded dough into a ball then place it in an oiled bowl turning once so all surfaces are coated lightly with oil—this prevents sticking later on! Cover tightly with plastic wrap or clean kitchen towel allowing it rise in warm place undisturbed until doubled in size (about 1-2 hours).
Step 6: Shape The Loaf
After first rise completes punch down gently deflating air bubbles formed inside! Transfer back onto floured surface divide into two equal pieces shaping each piece into rectangular loaves fitting snugly within greased loaf pans approximately measuring around eight inches long—the goal here being uniformity throughout baking process!
Step 7: Second Rise
Cover both shaped loaf pans again allowing another rise phase—this time lasting anywhere from thirty minutes up until one hour depending upon room temperature conditions! Loaves should puff up noticeably larger than their original size before proceeding onward towards baking stage!
Step 8: Bake The Bread
Preheat oven temperature setting at three hundred fifty degrees Fahrenheit while waiting patiently on those lovely risen beauties! Once preheated gently transfer loaf pans into oven space evenly distributing them across racks ensuring adequate airflow surrounding each pan’s edges—bake until golden brown crust forms visibly indicating readiness typically around thirty-five forty minutes duration marks!
Step 9: Cool And Enjoy
Remove baked loaves from ovens transferring them onto wire racks letting cool completely prior slicing—this crucial step avoids gummy interiors resulting from premature cutting! Once cooled thoroughly slice away serving deliciousness straight away alongside favorite spreads like butter jams etc., relish every bite savoring homemade goodness!

Serving and Storing Tips
Serving Suggestions
Amish White Bread shines brightly when served fresh out of the oven but can also be enjoyed toasted with spreads like butter or jam for breakfast or snack time delights! Consider making scrumptious sandwiches filled with deli meats cheeses veggies etc., perfect lunch options packed full flavor nutrition! A side salad accompanied by warm slices could transform any meal occasion effortlessly elevating dining experience drastically!
Storing Leftovers
To maintain freshness post-baking ensure storing leftovers properly—they should ideally be wrapped tightly using plastic wrap aluminum foil preventing them from drying out too quickly! Place wrapped loaves within resealable bags stored at room temperature enjoying within three days’ timeframe; alternatively freeze portions needed longer-term storage preserving quality effectively extending shelf life up till three months!
By following these steps closely along with insightful tips shared throughout our journey together today creating delightful batches delectable homemade treats has never been easier! Embrace these traditions cherish moments spent preparing wonderful creations loved ones alike will surely appreciate immensely savoring every bite shared among them lovingly crafted hands-on experiences forever cherished memories made together through culinary adventures embarked upon sharing delectable joys discovered along way!
Mistakes to avoid
When making Amish White Bread, several mistakes can hinder your results. One common mistake is using the wrong type of flour. All-purpose flour works well, but bread flour offers more gluten, resulting in a chewier texture. Avoid mixing different flours unless you’re familiar with how they behave during baking.
Another frequent error is not measuring ingredients accurately. Baking is a science, and precise measurements impact the final product’s texture and taste. Always use measuring cups and spoons specifically designed for dry and liquid ingredients to ensure accuracy.
Not allowing enough rising time is another pitfall. The dough needs to double in size during the first rise and increase again after shaping it into loaves. Skimping on this time could lead to dense bread that lacks the lightness characteristic of Amish White Bread.
Overworking the dough can also ruin your loaves. Kneading helps develop gluten, but excessive kneading can make bread tough instead of tender. Aim for a smooth, elastic dough that springs back when poked.
Lastly, neglecting oven temperature can affect the crust and crumb. Ensure your oven is preheated adequately before baking for an even cook. Using an oven thermometer can help maintain the right temperature throughout the baking process.

Tips and tricks
To perfect your Amish White Bread, consider some essential tips. First, use fresh yeast for optimal rising power. Check expiration dates on packets or jars before using them, as stale yeast won’t produce good results.
Second, incorporate vital wheat gluten if you’re using all-purpose flour. This addition enhances elasticity and gives your bread that desirable structure. Mix it well with the flour before adding other ingredients to ensure even distribution.
A third tip focuses on hydration levels in your dough. If your dough feels too dry, gradually add water until it reaches a soft but not sticky consistency. On the other hand, if it’s too wet, sprinkle in small amounts of flour while kneading until you achieve the right texture.
Also, consider experimenting with different types of sweeteners like honey or brown sugar instead of white sugar for added flavor depth. These alternatives not only enhance taste but can also contribute to better browning during baking.
Finally, let your baked bread cool completely before slicing it. Cutting into warm bread may seem tempting but will result in a gummy texture rather than clean slices. Allowing it to cool helps set its crumb structure for better presentation and enjoyment.
Suggestions for Amish White Bread
When crafting your Amish White Bread, think about using high-quality ingredients for the best flavor and texture possible. Opt for organic flours and fresh dairy products to elevate your recipe significantly.
Consider enriching your dough with additional flavors like herbs or spices if desired. Incorporating garlic powder or dried rosemary can introduce delightful undertones that elevate traditional white bread into something special.
Experimenting with mix-ins like chopped nuts or seeds is another suggestion worth trying. These additions bring texture and nutritional benefits without compromising the classic flavor profile of Amish White Bread.
If you want a crustier loaf, try placing a pan of hot water at the bottom of your oven while baking. This steam creates a crisp crust while ensuring that moisture remains within the loaf itself—resulting in a perfect balance between crusty exterior and soft interior.
Lastly, don’t hesitate to try different shapes when forming your loaves; braiding or shaping into rolls allows you to customize presentation for special occasions or family gatherings while maintaining the same delicious recipe underneath.

FAQs
What makes Amish White Bread unique?
Amish White Bread stands out due to its soft texture and slightly sweet flavor profile resulting from simple ingredients such as flour, water, sugar, salt, and yeast. The method typically involves long rise times that develop flavor naturally over time rather than relying solely on additional additives or preservatives found in commercial breads.
How do I store my Amish White Bread properly?
To keep your freshly baked Amish White Bread at its best quality longer, store it in a cool place wrapped tightly in plastic wrap or placed inside an airtight container after cooling completely. For extended storage options beyond three days at room temperature, consider freezing slices individually wrapped; this way ensures they remain fresh when needed later on!
Can I use whole wheat flour instead?
While you can substitute whole wheat flour when making Amish White Bread, keep in mind that this will alter both taste and texture significantly compared to traditional recipes made primarily with all-purpose flour or bread flour combinations which yield lighter results overall due to higher gluten content present within those blends!
Why isn’t my bread rising properly?
If your Amish White Bread isn’t rising properly during fermentation stages likely due issues related either directly related yeast activation (stale yeast) environmental factors (cold temperatures) affecting dough development times too little warmth slows down necessary fermentation processes crucial achieving fluffy end result we desire!
Is there an alternative sweetener I can use?
Yes! You may substitute refined sugars within recipe called-for quantities honey agave syrup maple syrup provide natural sweetness depth flavors without sacrificing integrity final product! Each sweetener may impart differing notes so experiment find what suits personal tastes preference best!
How can I tell when my bread is done baking?
To determine if your Amish White Bread has finished baking correctly tap lightly bottom loaf; if it sounds hollow then indicate readiness! Additionally checking internal temperature should range between 190°F-200°F confirming thorough cooking ensuring safety consumption delicious enjoyment slice afterwards!
Conclusion
In summary, creating perfect Amish White Bread involves understanding key components such as ingredient selection and proper techniques while avoiding common pitfalls that could hinder desired outcomes along way! Focus on accurate measurements paired with adequate rise times yields light airy loaves full rich flavors enjoyed by all who partake them! By following recommended tips incorporating suggestions provided above you’ll elevate everyday recipe into something extraordinary—ideal sharing loved ones gatherings alike! With patience practice anyone can master art making scrumptious homemade breads capable impressing family friends alike!
PrintAmish White Bread
Amish White Bread is a soft, fluffy, slightly sweet homemade bread that’s perfect for sandwiches, toast, or simply enjoying with butter. This classic recipe is easy to follow and yields two beautiful loaves with a tender crumb. Its versatility and delightful texture make it a staple in any kitchen, whether for breakfast, lunch, or dinner.
- Prep Time: 15 minutes
- Cook Time: 25–30 minutes
- Total Time: 2 hours
- Yield: 2 loaves 1x
- Category: Desserts
- Method: Baking
- Cuisine: Amish, American
- Diet: Vegetarian
Ingredients
- 2 cups warm water (110°F/45°C)
- 2/3 cup granulated sugar
- 1 1/2 tablespoons active dry yeast
- 1 1/2 teaspoons salt
- 1/4 cup vegetable oil
- 6 cups all-purpose flour
Instructions
- Activate the Yeast:
- In a large mixing bowl, combine the warm water and sugar. Stir until dissolved.
- Sprinkle the yeast over the water mixture and let it sit for 5–10 minutes, or until it becomes frothy.
- Mix the Dough:
- Add the salt and vegetable oil to the yeast mixture. Gradually stir in the flour, one cup at a time, until a soft dough forms.
- Knead the Dough:
- Turn the dough out onto a floured surface and knead it for about 8–10 minutes, or until it becomes smooth and elastic.
- First Rise:
- Place the dough in a greased bowl, turning it once to coat the surface. Cover with a clean kitchen towel and let it rise in a warm place for 1 hour, or until it has doubled in size.
- Shape the Loaves:
- Punch down the dough to release air bubbles. Divide it in half and shape each portion into a loaf.
- Place the loaves into two greased 9×5-inch loaf pans.
- Second Rise:
- Cover the loaf pans with a towel and let the dough rise again for 30–40 minutes, or until it has risen about 1 inch above the edges of the pans.
- Bake the Bread:
- Preheat the oven to 350°F (175°C).
- Bake the loaves for 25–30 minutes, or until the tops are golden brown and the bread sounds hollow when tapped.
- Cool and Serve:
- Remove the loaves from the pans and let them cool on a wire rack. Slice and serve warm or at room temperature.
Notes
- For a richer flavor, you can substitute part of the all-purpose flour with bread flour.
- Store the bread in an airtight container at room temperature for up to 3 days, or freeze for longer storage.
- This bread is perfect for sandwiches, French toast, or just with a smear of jam or butter.
Keywords: Amish White Bread, homemade white bread, soft bread recipe, fluffy bread, easy bread recipe, traditional bread, sandwich bread, baking bread, classic bread recipe.


