Introduction and Key Insights
Christmas Pinwheel Cookies are a festive delight that adds color and cheer to any holiday gathering. These cookies not only look stunning with their vibrant swirls of red and green but also taste incredibly delicious. The combination of buttery dough infused with flavors like peppermint or vanilla makes each bite a true celebration of the season. Baking these cookies is more than just a culinary activity; it’s a joyful experience that brings families together during the holidays. You can engage children in the rolling process, allowing them to see how simple ingredients transform into beautiful creations.
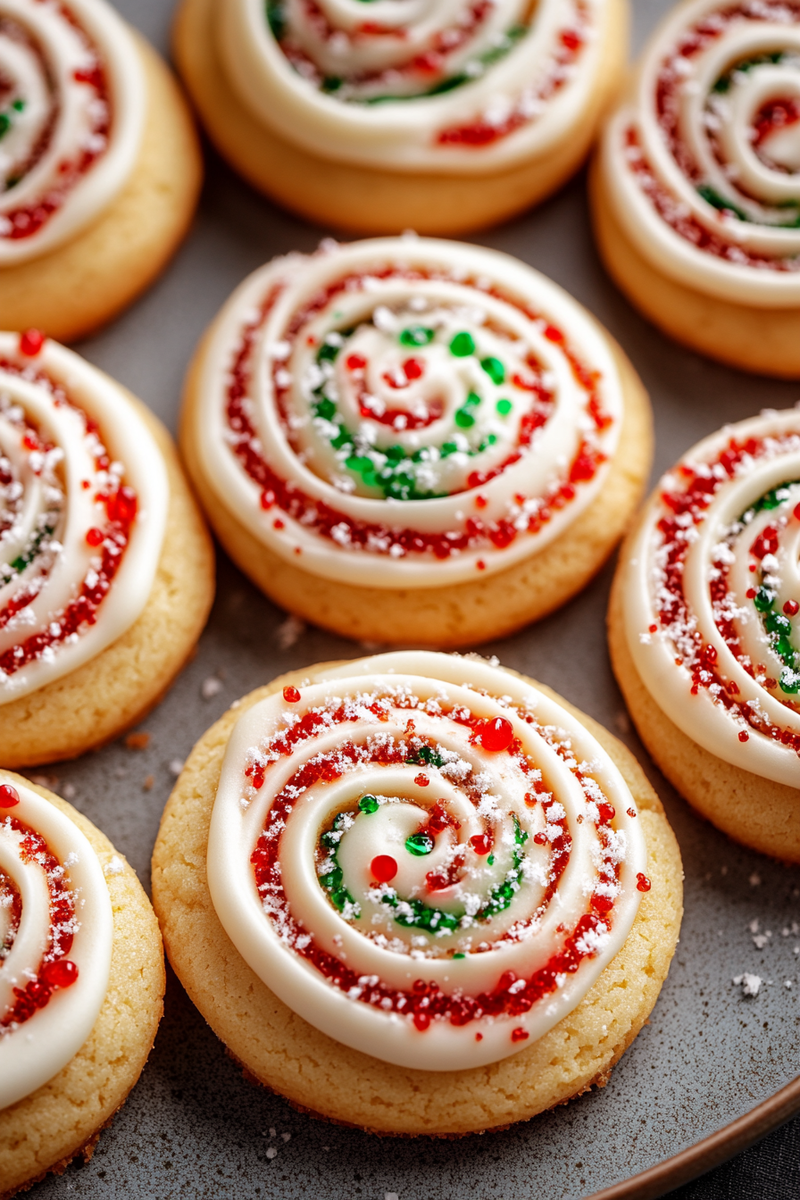
This recipe is versatile—feel free to play around with colors and flavors according to your preferences or dietary needs. Imagine serving these eye-catching treats at your next holiday party or gifting them to friends and family in decorative tins. The joy of baking Christmas Pinwheel Cookies does not just lie in the final product but also in the memories created while making them. Whether you’re an experienced baker or a beginner in the kitchen, this guide will take you through each step seamlessly. So roll up your sleeves and prepare for an unforgettable baking session filled with fun, flavor, and festive spirit!
Ingredients Overview for Christmas Pinwheel Cookies
All-Purpose Flour
All-purpose flour forms the base of your Christmas Pinwheel Cookies, providing structure and stability. You’ll need around 2 cups for this recipe. Make sure to measure accurately by spooning the flour into a measuring cup and leveling it off with a knife. This prevents dense cookies that can result from packing flour too tightly.
Unsalted Butter
Unsalted butter is essential for achieving that rich flavor and tender texture in your cookies. You will need 1 cup (2 sticks) softened at room temperature. Softening allows the butter to cream easily with sugar, creating an airy mixture that helps lift your cookies as they bake.
Granulated Sugar
Granulated sugar sweetens your cookie dough and contributes to its lovely texture. Use about 3/4 cup in this recipe. When creamed with butter, sugar incorporates air into the mixture, resulting in fluffy cookies once baked.
Brown Sugar
Brown sugar adds moisture and a slight caramel flavor that complements the vanilla perfectly. For this recipe, you’ll want 1/4 cup packed brown sugar. The molasses in brown sugar enhances both taste and chewiness.
Egg
An egg acts as a binder in your cookie dough while adding richness. One large egg is sufficient for this recipe—just make sure it’s at room temperature for better mixing.
Vanilla Extract
Vanilla extract elevates the flavor profile of your cookies significantly. You’ll need 1 teaspoon of pure vanilla extract—always opt for pure over artificial for superior taste.
Food Coloring
Choose food coloring gel or liquid based on what colors you want your swirls to be! You’ll typically use red and green colors—start with about 1/2 teaspoon of each color until you reach your desired vibrancy.
Powdered Sugar
Powdered sugar is optional but recommended if you want to dust over finished cookies for added sweetness and visual appeal—about 1/4 cup should suffice.

How to Prepare Christmas Pinwheel Cookies
Step 1: Creaming Butter and Sugars
Begin by preheating your oven to 350°F (175°C). In a large mixing bowl, combine your softened unsalted butter with granulated sugar and brown sugar using an electric mixer on medium speed until light and fluffy—approximately 3-5 minutes should suffice here. This process introduces air into the mixture which will make your cookies soft yet chewy after baking. Scrape down the sides of the bowl occasionally to ensure everything mixes evenly.
Once creamy, add one large egg along with one teaspoon of vanilla extract into the mixture; continue mixing until fully incorporated into a smooth batter without lumps or streaks remaining visible.
Step 2: Incorporating Dry Ingredients
In another bowl, whisk together all-purpose flour along with a pinch of salt (about 1/4 teaspoon) until evenly combined—this ensures that salt distributes uniformly throughout the cookie dough while balancing out sweetness from sugars used earlier! Gradually add this dry mixture into wet ingredients while mixing on low speed; stop when just combined so as not to overwork gluten strands formed by flour which could lead cookie texture being tough rather than tender!
At this point divide dough evenly into two separate bowls; leave one plain while adding food coloring gel (or liquid) into another bowl stirring gently until uniform color achieved throughout entire batch—a few drops usually suffice depending on specific brand used so adjust accordingly based upon personal preference!
Step 3: Rolling Out The Dough
Lay down parchment paper onto clean workspace before placing each colored dough ball separately onto surface area—position side-by-side if space allows! Using rolling pin dusted lightly with flour roll out first layer (plain colored) gently into rectangle shape approximately 1/4 inch thick ensuring even thickness across entire piece so all edges cook uniformly when baked later on!
Repeat same process using second colored dough ball working carefully so as not tear through either layer during rolling phase! Once both layers have been rolled out stack them atop one another aligning edges closely together then begin tightly rolling up from one end towards opposite edge creating log-like appearance resembling jelly roll cake!
Step 4: Chilling The Dough
Wrap rolled-up cookie log tightly in plastic wrap ensuring no air pockets remain trapped within cylinder before placing inside refrigerator; chill for at least an hour or longer if desired firm texture preferred during cutting phase later on! This step helps maintain shape while slicing preventing unwanted spreading once placed onto baking sheet prior going into oven so don’t skip it!
After chilling time has elapsed remove from fridge allowing it sit briefly at room temperature allowing easier slicing action next along way—using sharp knife slice through cylindrical log creating individual rounds roughly 1/4 inch thick each cutting straight down rather than sawing back-and-forth motion which might distort shape further complicating presentation aesthetics!
Step 5: Baking The Cookies
Preheat oven again if necessary ensuring temperature remains steady before transferring sliced pinwheels onto lined baking sheets spaced about an inch apart avoiding overcrowding which could lead uneven cooking results across different batches overall! Bake until edges start turning golden brown (approximately 10-12 minutes) keeping careful watch towards final moments since some ovens tend heat differently requiring adjustments made accordingly based upon specific appliance model being utilized personally!
Remove trays from oven allowing cooling duration lasting around five minutes minimum before transferring onto wire racks finish cooling completely afterward garnish powdered sugar dusting over tops if desired enhancing appearance further elevating overall festive nature these treats undoubtedly showcase splendidly during holiday gatherings ahead!

Serving and Storing Tips
Serving Suggestions
Presenting Christmas Pinwheel Cookies beautifully can enhance their appeal even further when hosting gatherings! Consider arranging them on decorative platters lined with festive paper doilies creating eye-catching display immediately captivating guests’ attention upon arrival into space itself! Pair these delightful confections alongside hot cocoa spiced apple cider or even classic eggnog completing overall seasonal ambiance experienced throughout event taking place nearby enticing everyone partake indulging scrumptious offerings available without hesitation whatsoever!
For larger parties consider packaging individual servings inside clear cellophane bags tied off ribbon offering easy grab-and-go options attendees wishing take home treat memories shared earlier festivities themselves adding personal touch gestures show appreciation hospitality extended towards loved ones gathered under roof celebrating joyous occasion together shared moments captured forever cherished fondly thereafter too!
Storing Your Cookies
Mistakes to avoid
One common mistake when making Christmas Pinwheel Cookies is not chilling the dough long enough. Chilling is crucial because it helps firm up the dough, making it easier to roll and cut. If you skip this step or don’t chill for at least an hour, your cookies could spread too much while baking, ruining their shape. Always allow sufficient time for the dough to rest in the refrigerator to achieve that perfect pinwheel design.
Another frequent error is using too much flour during the rolling process. While it’s tempting to sprinkle extra flour to prevent sticking, overdoing it can lead to dry cookies. Instead, lightly dust your work surface with just enough flour to roll out the dough without sticking. This way, you maintain the right texture and moisture level in your Christmas Pinwheel Cookies.
Not following the recipe’s ingredient temperature can also affect your results. For instance, if butter is too cold or melted instead of softened, it may lead to a dense cookie instead of a light and airy one. Make sure all your ingredients are at room temperature as specified in the recipe. This ensures better blending and ultimately enhances the flavor profile of your cookies.
Finally, many bakers overlook how important even baking is for these cookies. Placing trays too close together can result in uneven baking; therefore, ensure there’s ample space between trays in the oven. Rotate them halfway through if your oven has hot spots. This will help achieve that beautiful golden color on each cookie.
Tips and tricks
To ensure perfect Christmas Pinwheel Cookies every time, start with quality ingredients. Fresh butter, high-quality vanilla extract, and good cocoa powder can make a significant difference in flavor. Choosing organic or premium ingredients elevates the overall taste of your cookies, making them more delightful for holiday gatherings.
When preparing the dough for Christmas Pinwheel Cookies, consider using a stand mixer instead of mixing by hand. A stand mixer allows for better incorporation of ingredients without overmixing them, which often leads to tough cookies. With a stand mixer, you can achieve a smoother dough quickly and efficiently.
In terms of rolling out the dough, use parchment paper between layers instead of flouring your surface excessively. Parchment prevents sticking without adding extra flour that could dry out your cookies. Moreover, rolling between sheets allows you to achieve an even thickness throughout the dough—key for consistent baking.
Another useful tip is to utilize a sharp knife or pizza cutter when slicing your rolled cookie dough into pinwheels. This will ensure clean cuts without squishing the rolls or losing their beautiful design. A serrated knife can work well but be gentle as you slice; you want to maintain those pretty swirls!
Lastly, experiment with various fillings for your pinwheel cookies! While classic flavors like chocolate and vanilla are popular choices, consider adding spices or zest like orange or peppermint extract for a holiday twist. These variations offer new tastes while still keeping within the spirit of traditional Christmas baking.
Suggestions for Christmas Pinwheel Cookies
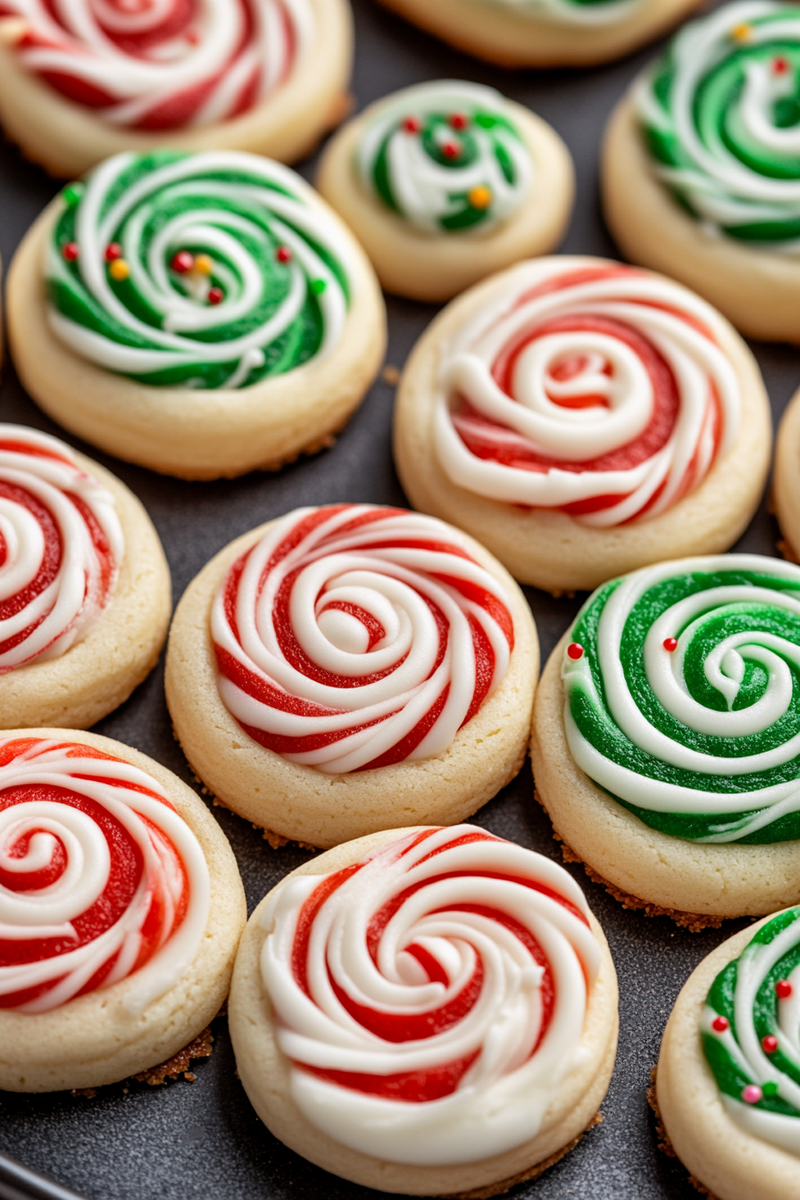
One suggestion is to create a festive color scheme with your Christmas Pinwheel Cookies by using natural food coloring or flavored extracts like peppermint or almond extract. Incorporating vibrant colors not only enhances visual appeal but also adds unique flavors that elevate holiday gatherings’ aesthetics and tastes.
Consider adding sprinkles on top before baking for an added festive touch! Choose edible glitter or colorful nonpareils that complement your cookie colors beautifully. Just sprinkle lightly on top before placing them in the oven; this creates an eye-catching finish once baked.
If you’re planning to gift these delightful treats during the holidays, packaging matters! Use clear cellophane bags tied with colorful ribbons or place them in decorative tins that reflect holiday cheer. Not only does this presentation enhance gifting experience but also keeps cookies fresh longer.
For those who love experimenting with textures, try incorporating crushed nuts into one of your cookie layers! Walnuts or pecans can add depth and crunchiness to your pinwheels while marrying perfectly with sweeter layers—a fantastic way to surprise guests during celebrations!
Lastly, don’t forget about dietary restrictions! Offer gluten-free options by substituting regular flour with almond flour or gluten-free all-purpose blends available at many grocery stores today! This ensures everyone gets to enjoy these delicious Christmas Pinwheel Cookies regardless of dietary needs.
FAQs
What is the best way to store Christmas Pinwheel Cookies?
Storing Christmas Pinwheel Cookies properly is essential for keeping them fresh and tasty. First, allow them to cool completely after baking before storing them away; this prevents condensation from forming inside storage containers which could make them soggy over time. Place cooled cookies in an airtight container lined with parchment paper between layers if you’re stacking them; this helps maintain texture while minimizing breakage risks during transport or storage. For maximum freshness, keep stored cookies at room temperature where they’ll last up to one week! If you want longer-lasting options, consider freezing unbaked rolled dough wrapped tightly in plastic wrap—this allows you easy access later without sacrificing flavor!
Can I make Christmas Pinwheel Cookies ahead of time?
Yes! Making Christmas Pinwheel Cookies ahead of time is not only possible but also practical during busy holiday seasons! You can prepare both the dough and filling up several days in advance; simply wrap each component tightly in plastic wrap and refrigerate until ready for use! When you’re prepared to bake them off later on—just roll out chilled pieces into pinwheels as directed—there’s no need for extra prep work when guests arrive unexpectedly! Alternatively, freeze already sliced unbaked pinwheels on a tray until firm then transfer into freezer bags—this way they maintain shape while frozen until baked straight from freezer—no thawing necessary!
Can I customize my Christmas Pinwheel Cookie flavors?
Absolutely! The beauty of Christmas Pinwheel Cookies lies in their versatility regarding flavors and fillings—you have numerous customization options available! Feel free to swap traditional vanilla extract with almond extract for different nuances or add spices like cinnamon or nutmeg into either layer’s batter—these elements enhance seasonal warmth within each bite! Additionally consider trying fruit preserves such as raspberry jam layered alongside chocolate swirls—the combination will undoubtedly impress family members gathering around festive tables!
How do I prevent my pinwheels from spreading during baking?
Preventing spreading when baking Christmas Pinwheel Cookies starts with proper chilling methods before putting them into an oven; allowing adequate chill time ensures firmer consistency preventing unwanted expansion once heat hits—this works wonders against overly soft batters usually prone towards flattening outwards upon contact with heat sources! Using parchment-lined baking sheets aids further since they allow airflow beneath cookie bottoms while ensuring minimal sticking occurs during removal once done baking—a great double whammy!
Are there any gluten-free alternatives for making these cookies?
Definitely! Crafting delicious gluten-free versions of traditional recipes has become incredibly popular nowadays due largely thanks advances seen within specialty flours designed specifically catering towards those avoiding gluten altogether! Substituting wheat-based flours like all-purpose flour found commonly among most recipes today should easily transition into alternative options such as almond meal/flour paired alongside additional starches like tapioca starch achieving desired consistency without compromising flavor integrity—it’s truly remarkable how adaptable these recipes have become!
What other festive decorations can I use on my cookies?
When looking at potential decorations aside from sprinkles there exist various alternatives providing creativity whilst enhancing visual appeal: edible glitter adds shimmer creating magical effects especially desirable during celebratory occasions; chocolate drizzles introduce elegance plus complementary sweetness harmonizing beautifully alongside existing flavors present within each bite; lastly incorporating candied citrus peels presents opportunity showcasing unique textures plus tastes elevating overall experience enjoyed by all who partake!
Conclusion
In summary, mastering the art of making Christmas Pinwheel Cookies involves paying careful attention to detail throughout each stage—from ingredient selection right down through final presentation techniques employed upon completion! Avoid common mistakes such as insufficient chilling times while incorporating helpful tips like utilizing quality tools ensures success every step along way toward achieving those perfect swirls we all love seeing around festive tables during holiday gatherings alike!
Don’t hesitate exploring customization options available when crafting these delightful treats—flavorful twists breathe new life into traditional favorites enhancing excitement surrounding seasonal celebrations shared amongst loved ones near far alike!
Finally remember: whether gifting packaged goodies filled brightly colored confections showcasing creativity galore delivering joy warmth alike remains key essence driving spirit behind sharing delicious moments together—a true testament showing just how special homemade treats become cherished memories made through culinary adventures explored across generations past present future shared joyously alike within family friends everywhere celebrating magic brought forth through cooking baking experiences enjoyed together year after year endlessly cherished forevermore.
Delightful Christmas Pinwheel Cookies Recipe
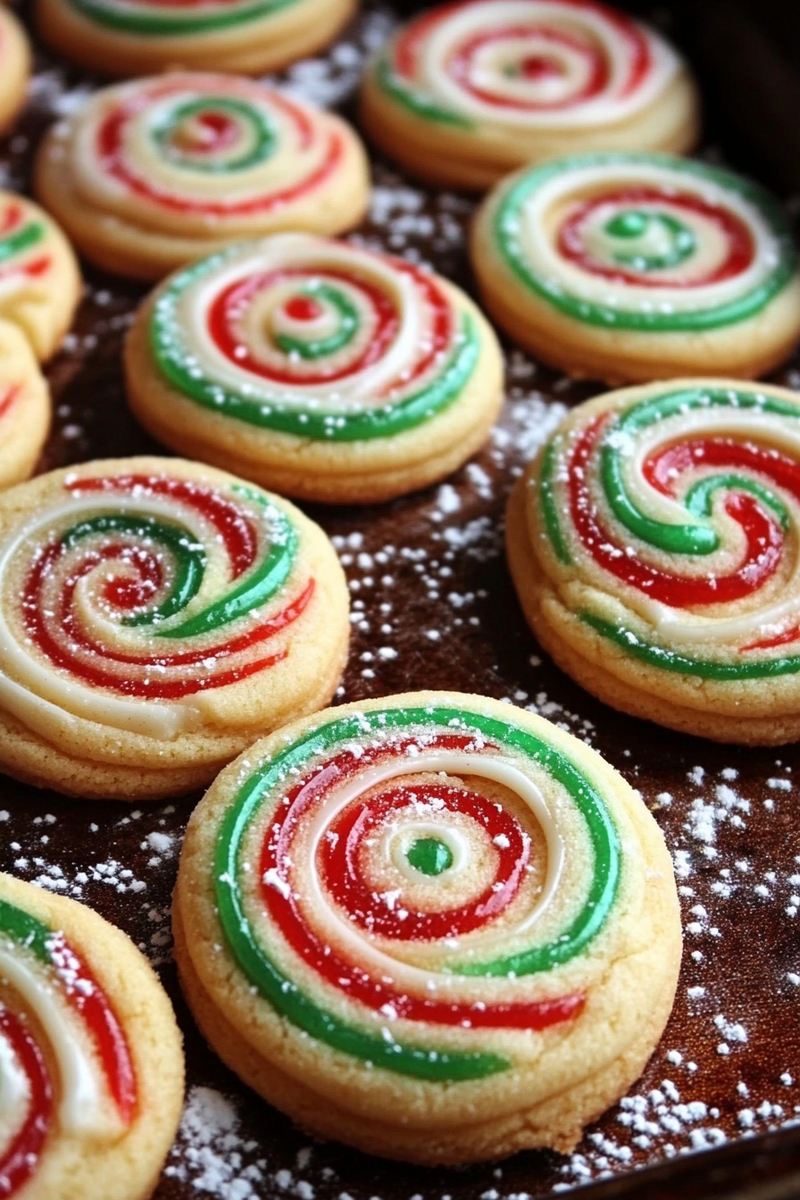
Brighten up your holiday baking with these festive Christmas Pinwheel Cookies! These delightful cookies feature vibrant red, green, and white spirals, making them a fun and eye-catching addition to your holiday dessert table. With a buttery, vanilla-flavored dough and a playful look, they’re perfect for cookie exchanges, Christmas parties, or as a gift for loved ones. Easy to customize with sprinkles or glitter, these cookies bring the holiday cheer! Holiday cookie recipes, festive pinwheel cookies, and Christmas baking ideas are trending keywords for this recipe.
- Prep Time: 30 minutes
- Cook Time: 12 minutes
- Total Time: 2 hours 42 minutes
- Yield: 24–30 cookies 1x
- Category: Dessert
- Method: Baking
- Cuisine: American
- Diet: Vegetarian
Ingredients
- 2 1/2 cups all-purpose flour
- 1/2 tsp baking powder
- 1/4 tsp salt
- 1 cup unsalted butter, softened
- 1 cup granulated sugar
- 1 large egg
- 2 tsp vanilla extract
- Red gel food coloring
- Green gel food coloring
- Optional: Holiday sprinkles or sanding sugar
Instructions
- Prepare the Dough:
In a medium bowl, whisk together the flour, baking powder, and salt. Set aside. - Cream Butter and Sugar:
In a large bowl, beat the butter and sugar until light and fluffy. Add the egg and vanilla extract, mixing until combined. - Combine Ingredients:
Gradually add the dry ingredients to the wet ingredients, mixing until a soft dough forms. - Divide and Color the Dough:
Divide the dough into three equal portions. Leave one portion plain, then color one portion red and the other green using the gel food coloring. Mix each until evenly colored. - Roll Out Layers:
Roll each portion of dough between sheets of parchment paper to about 1/4-inch thickness, creating three rectangular layers of the same size. Chill in the refrigerator for 15–20 minutes to firm up. - Assemble the Pinwheel:
Stack the layers: place the green layer on the bottom, the white layer in the middle, and the red layer on top. Use a rolling pin to gently press them together. Trim the edges for evenness. - Roll the Dough:
Starting from one long edge, tightly roll the dough into a log. Wrap the log in plastic wrap and refrigerate for at least 2 hours or until firm (or freeze for 30 minutes if short on time). - Slice and Bake:
Preheat the oven to 350°F (175°C). Line baking sheets with parchment paper. Slice the dough log into 1/4-inch thick rounds and place on the prepared baking sheets, spacing them about 2 inches apart. - Bake:
Bake for 10–12 minutes, or until the edges are just set but not browned. Let cool on the baking sheet for 5 minutes, then transfer to a wire rack to cool completely.
Notes
- For extra holiday flair, roll the dough log in holiday sprinkles before chilling.
- Dough can be made ahead and frozen for up to 1 month. Thaw slightly before slicing.
- These cookies make great edible gifts when packaged in festive tins or bags.
Keywords: Christmas Pinwheel Cookies, holiday cookies, festive cookie recipes, colorful cookies, easy Christmas cookies, baking ideas for the holidays.
