Introduction and Key Insights
Banana pudding is a timeless dessert that evokes nostalgia and joy with every spoonful. This creamy delight combines layers of ripe bananas, rich vanilla pudding, and crunchy vanilla wafers, making it a favorite among both kids and adults. Whether it’s a family gathering, a potluck, or just a sweet treat at home, this classic dessert never fails to impress.
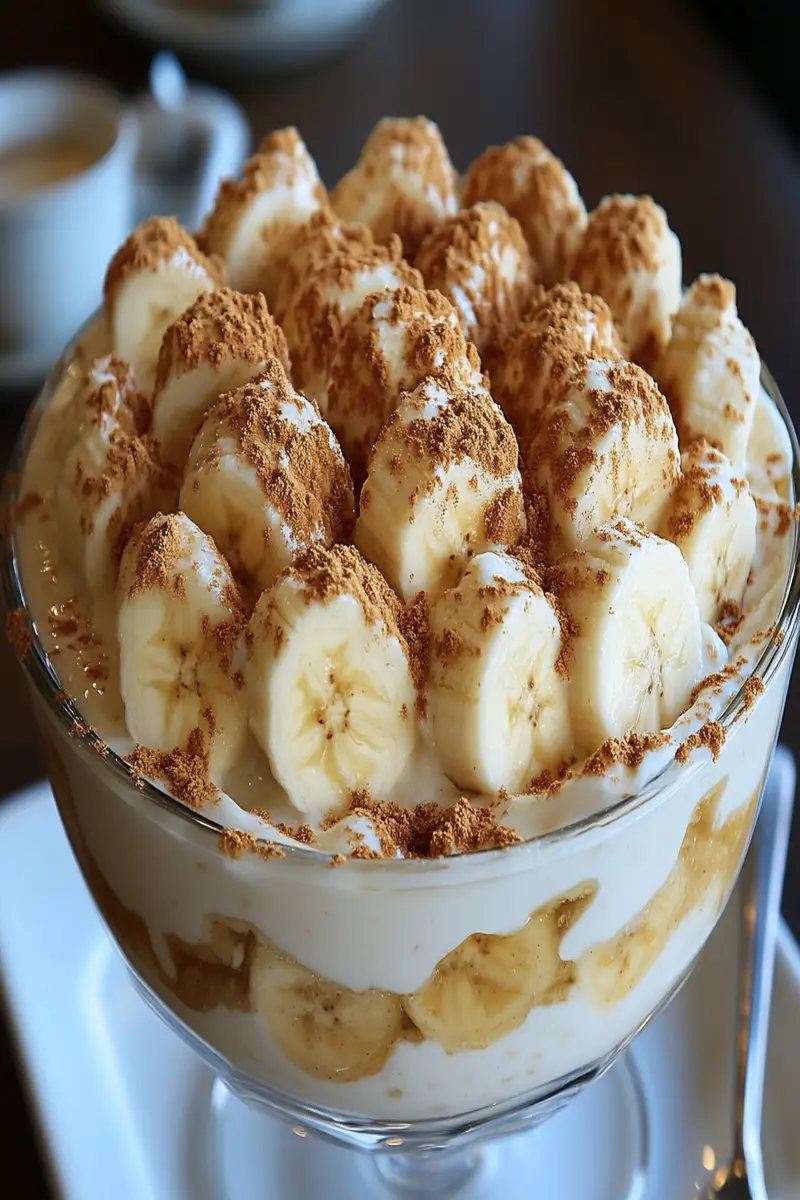
In this article, we will walk you through an easy-to-follow recipe for banana pudding that guarantees satisfaction. You’ll learn about the essential ingredients needed to achieve that perfect balance of flavors and textures. Additionally, we’ll share step-by-step instructions to ensure your homemade banana pudding turns out flawless every time. Plus, we will provide tips on serving and storing this delicious treat so you can enjoy it at its best.
By the end of this guide, you’ll be equipped with all the knowledge required to create your own irresistible banana pudding from scratch. Let’s dive into the ingredients overview before we get cooking!
Ingredients Overview for Banana Pudding
Ripe Bananas
Ripe bananas are the star of this recipe. Choose bananas that are slightly speckled but not overly brown; they should be firm yet sweet. The sweetness of ripe bananas enhances the overall flavor of the pudding while providing a creamy texture as they soften in the mix. Aim for about three medium-sized bananas to achieve the right balance in each layer.
Vanilla Pudding Mix
For a smooth and flavorful base, use instant vanilla pudding mix. This mix is convenient because it requires no cooking—just add milk! The vanilla flavor complements the bananas beautifully and provides that classic taste we all love in banana pudding. You’ll need one 3.4-ounce box for this recipe.
Whole Milk
Whole milk adds richness to your vanilla pudding mixture. It helps create a creamy texture that’s essential for a delicious banana pudding experience. Use about two cups of whole milk when preparing your instant vanilla pudding mix; it ensures that your dessert is velvety without being too heavy.
Vanilla Wafers
Vanilla wafers not only add crunch but also absorb some moisture from the bananas and pudding mixture, creating a delightful contrast in texture. Use about 2 cups of these cookies; they will be layered throughout your dish to create that signature look and taste.
Whipped Topping
To finish off your banana pudding with an airy feel, incorporate whipped topping (either homemade or store-bought). This light addition balances out the density of the bananas and pudding while adding an appealing visual aspect to your dessert. About 1 cup should suffice for layering on top.

How to Prepare Banana Pudding
Step 1: Prepare the Vanilla Pudding Mixture
Start by whisking together your instant vanilla pudding mix with two cups of cold whole milk in a large mixing bowl. Make sure you whisk vigorously until there are no lumps remaining; this should take about two minutes. The mixture will thicken up quickly as you stir—this is normal! Once smooth and thickened, set aside for five minutes while you prepare other components. Ensure it remains chilled during this time as it helps maintain its lush texture.
Step 2: Slice the Bananas
While your pudding sets up nicely in its bowl, take three ripe bananas and slice them into thin rounds about half an inch thick. Arrange them on a plate or directly on parchment paper if you’d like to keep them from browning too quickly before assembly begins. Ensure uniformity in thickness since this will contribute positively to both aesthetics and mouthfeel when layered later on.
Step 3: Layer the Ingredients
Now comes the fun part! Grab a trifle dish or individual serving cups if you prefer smaller portions for easier serving later on. Start with a layer of your prepared vanilla pudding at the bottom—about one-third of what you made should suffice here as it forms a stable base.
Next up are those beautiful slices of fresh bananas; distribute them evenly over the first layer followed by crumbled vanilla wafers sprinkled generously on top—not too much though as we want some crunch left for later layers too! Repeat this process until all components have been used up—aiming for three or four layers depending on how deep your dish is.
Step 4: Finish with Whipped Topping
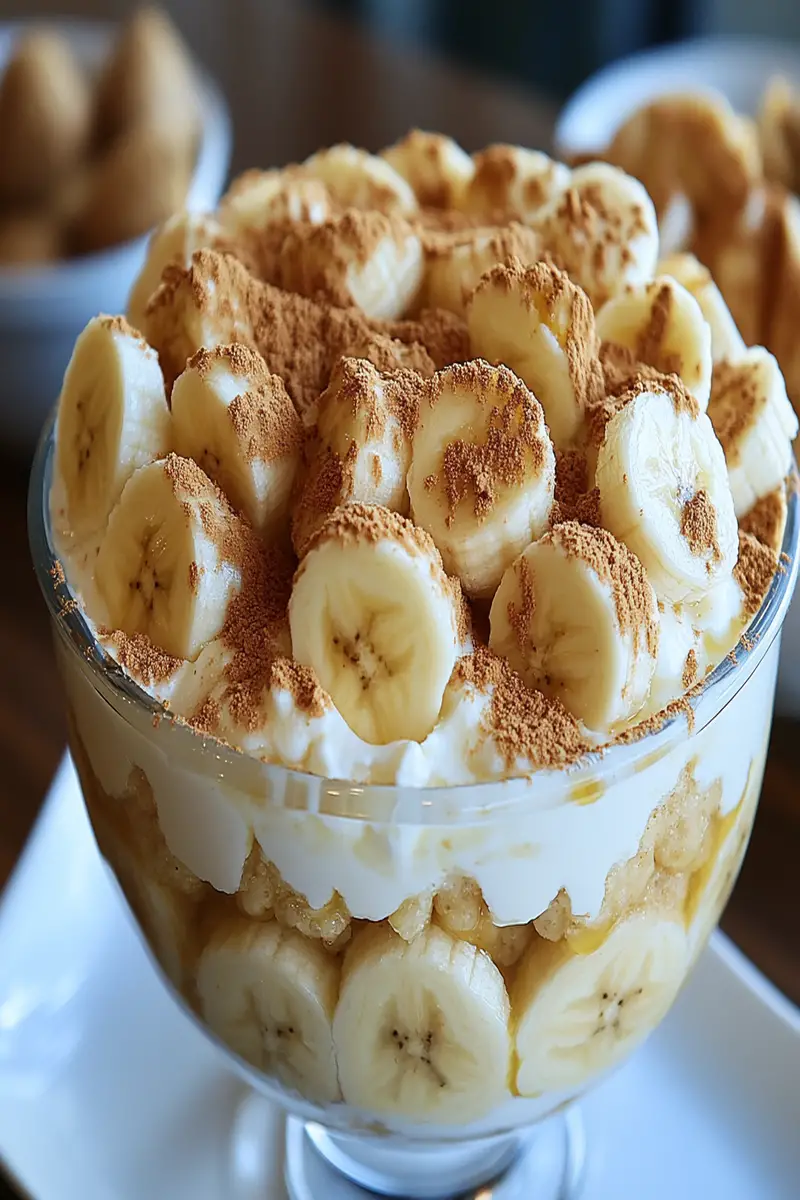
Once you’ve completed layering everything nicely in your chosen vessel(s), grab that whipped topping you prepared earlier (or store-bought if you went that route). Spread it evenly across the topmost layer using an offset spatula or back of a spoon—this gives it an appealing finish! For added flair, consider garnishing with remaining cookie crumbles or even some sliced strawberries if desired before covering tightly with plastic wrap.
Serving and Storing Tips
Serving Suggestions
Banana pudding can be served immediately after assembly or chilled in the refrigerator for about two hours beforehand—this allows flavors to meld together beautifully! When ready to serve guests (or yourself!), simply scoop out portions using either spoons or dessert scoops depending on how generous you’re feeling today! For an elegant touch at gatherings opt for parfait glasses filled halfway before adding additional toppings such as crushed nuts or sprigs mint leaves which elevate its presentation even further!
Storage Guidelines
If there happen to be leftovers (which might be unlikely given how delicious this treat is), store them correctly! Cover any uneaten portions tightly using plastic wrap—you want minimal air exposure here—to keep everything fresh while preventing browning from occurring due exposure oxygen levels present around bananas over time too longer than necessary outside their protective coats inside those lovely layers created earlier!
It’s ideal not letting leftovers sit longer than three days max within fridge environment due possible spoilage risks associated certain ingredients used initially here including perishables mentioned above like fruits themselves especially when mixed together already having interacted previous stages leading up final product completion stage achieved successfully earlier!
With these tips under your belt now enjoy creating mouthwatering moments sharing indulgence everyone loves indulging in whenever opportunity arises next time around!
Mistakes to Avoid
When making banana pudding, there are several common mistakes that can affect both the taste and texture of this delightful dessert. One major mistake is using under-ripe bananas. Bananas that are not fully ripe lack the sweetness and creamy texture that contribute to the pudding’s overall flavor. For the best results, choose bananas that have a few brown spots on their skin. This indicates they are perfectly ripe and will blend well into your pudding.
Another mistake is overcooking the pudding mixture. Many people tend to cook it longer than necessary, thinking it will enhance thickness. However, overcooking can lead to a grainy texture instead of the smooth consistency you desire. It’s important to cook the mixture just until it thickens, usually around 10-15 minutes on medium heat while stirring continuously.
Additionally, neglecting to layer the ingredients properly can lead to uneven flavor distribution. The beauty of banana pudding lies in its layers of cookies, bananas, and creamy filling. Be sure to layer these ingredients thoughtfully in your serving dish for a visually appealing dessert that also offers balanced flavors in each bite.
Finally, some people forget to chill their banana pudding before serving. Allowing it to sit in the refrigerator for several hours or overnight allows all the flavors to meld together beautifully. Serving it immediately may result in a less flavorful experience.
By avoiding these common mistakes, you can create a delicious banana pudding that will impress your family and friends.

Tips and Tricks
Creating the perfect banana pudding requires attention to detail and some helpful tips and tricks. First, always use fresh ingredients for the best flavor. Using freshly whipped cream instead of store-bought will elevate your dessert significantly. Whipping your own cream allows you to control the sweetness and achieve a light, airy texture that pairs excellently with bananas.
Another tip is to incorporate flavor variations into your banana pudding. While traditional recipes are fantastic, consider adding a splash of vanilla extract or even almond extract for an extra depth of flavor. You might also experiment with different types of cookies; vanilla wafers are classic but using graham crackers or chocolate cookies can add an exciting twist.
Temperature plays a crucial role in preparing banana pudding as well. Make sure all your ingredients are at room temperature before mixing them together. This ensures better incorporation and prevents lumps from forming in your custard mixture.
Furthermore, don’t skip on garnishing! Adding slices of fresh bananas or crumbled cookies on top not only enhances visual appeal but also adds texture when serving. A sprinkle of cinnamon or cocoa powder can add an elegant touch too.
Lastly, patience is key when allowing your banana pudding to set in the fridge. The longer it chills, the better the flavors develop. Aim for at least four hours but ideally let it sit overnight for maximum taste satisfaction.
By following these tips and tricks, you’ll be well on your way to creating a luxurious banana pudding that everyone will love.
Suggestions for Banana Pudding
When preparing banana pudding, certain suggestions can help you enhance its taste and presentation further. One suggestion is to use high-quality vanilla extract instead of imitation vanilla. The rich flavor from pure vanilla makes a significant difference in elevating your dessert’s overall profile.
Consider layering more than just bananas within your dessert as well; adding caramel sauce or chocolate ganache between layers can take your banana pudding to new heights! These additions not only introduce new flavors but also provide visual contrast that makes each bite exciting.
Using different textures is another great suggestion for improving your banana pudding experience. Incorporate crunchy elements such as crushed nuts or toasted coconut flakes into some layers for added crunchiness against the softness of bananas and creaminess of custard.
If you’re looking for a healthier option, try substituting some ingredients with lighter alternatives without sacrificing flavor—use Greek yogurt instead of heavy cream or swap out some sugar with honey or maple syrup for natural sweetness.
Presentation matters too! Serve individual portions in clear glass cups or jars so guests can see those beautiful layers of cookie crumbs, bananas, and creamy filling peeking through. Such presentation makes your dessert look inviting while emphasizing its delightful components.
These suggestions will not only enhance your banana pudding’s flavor but also make it visually appealing!

FAQs
What types of bananas are best for banana pudding?
When selecting bananas for delicious banana pudding, always opt for ripe ones with brown spots on their skins. These indicate that they have reached peak ripeness and will deliver optimal sweetness and flavor when blended into your dessert. Using green or overly firm bananas may result in an underwhelming taste because they lack essential sugars developed during ripening processes.
In addition, consider using slightly overripe bananas if you want an intense sweetness level; however make sure they aren’t too mushy as this could compromise texture quality within your finished dish!
Can I prepare banana pudding ahead of time?
Yes! In fact, preparing banana pudding ahead of time is highly recommended as it allows all flavors to meld beautifully together during chilling periods—ideally overnight in the fridge before serving day! This resting period helps achieve optimal taste while ensuring ingredients like cookies soften slightly without becoming soggy right away—a perfect balance between creamy custard filling layered alongside sweet ripe bananas!
How long does homemade banana pudding last?
Homemade banana pudding typically lasts about three days when stored correctly in an airtight container within refrigeration settings after first preparation time frame has elapsed—though do keep track since freshness depends greatly upon ingredient quality used initially! After three days pass by chances increase significantly regarding spoilage risk due largely due breakdown occurring among perishable components such as dairy products involved within recipe framework itself.
Can I freeze leftover banana pudding?
Freezing leftover banana pudding isn’t advisable because freezing causes separation between various layers leading towards undesirable textural outcomes once thawed later down line; moreover cold temperatures alter original consistency making previously smooth custards turn into grainy mixtures post-freeze cycle completion! If you wish still try freezing options available—consider separating components (like cookies) from custard mixture beforehand assembling them back together upon defrosting process completion instead!
What can I use instead of vanilla wafers?
If you’re looking for alternatives to traditional vanilla wafers when making your banana pudding recipe options abound! Consider using graham crackers which lend subtle sweetness along with buttery undertones—great complementing flavors enhancing overall experience! Alternatively chocolate sandwich cookies provide contrasting richness while offering delightful visuals alongside creamy yellow hues found throughout completed dish—an unexpected yet enjoyable combination!
How can I make my banana pudding healthier?
To create healthier versions without sacrificing taste try swapping out heavy creams used traditionally with lighter options like Greek yogurt; this switch boosts protein content while maintaining creamy textures desired throughout final product itself! Reducing sugar levels via natural sweeteners such as honey/maple syrup also enhances health benefits without compromising delightful essence known from beloved desserts like this one allowing enjoyment guilt-free!
Conclusion
In conclusion, mastering the art of making delicious banana pudding involves avoiding common pitfalls while incorporating effective tips and tricks into your preparation process. Selecting ripe bananas ensures natural sweetness shines through every layer you create while paying careful attention during cooking prevents undesirable textures from forming within custard mixtures themselves!
Always remember that patience pays off; allowing ample chilled time enhances flavors significantly resulting in scrumptious bites filled with harmonized tastes coming together beautifully—a true crowd-pleaser at any gathering!
Implementing small suggestions like using high-quality ingredients alongside creative layering techniques heightens visual appeal whilst introducing exciting new dimensions towards classic recipes enjoyed widely today!
By keeping these key points in mind as you navigate through crafting this beloved dessert everyone enjoys so much—you’ll be equipped with knowledge needed ensuring success every single time preparing indulgent treats guaranteed impress even most discerning palates out there!
PrintEasy and Delicious Banana Pudding Recipe
Banana Pudding is a classic, creamy dessert layered with sweet vanilla pudding, sliced bananas, and vanilla wafers. Topped with whipped cream or meringue, it’s a crowd-pleaser perfect for potlucks, family gatherings, or as a comforting treat.
- Prep Time: 15 minutes
- Cook Time: 4 hours
- Total Time: 4 hours 30 minutes
- Yield: 8 servings 1x
- Category: Desserts
- Method: No-Bake
- Cuisine: American
- Diet: Vegetarian
Ingredients
For the Pudding:
- 3 cups whole milk
- 3/4 cup granulated sugar
- 1/3 cup cornstarch
- 1/4 tsp salt
- 4 large egg yolks
- 2 tsp vanilla extract
- 2 tbsp unsalted butter
For the Layers:
- 4–5 ripe bananas, sliced
- 1 box (12 oz) vanilla wafers
For the Topping:
- 1 cup heavy whipping cream
- 1/4 cup powdered sugar
- 1/2 tsp vanilla extract
Instructions
- Prepare the Pudding:
- In a medium saucepan, whisk together milk, sugar, cornstarch, and salt until smooth. Cook over medium heat, stirring constantly, until the mixture begins to thicken.
- In a separate bowl, whisk the egg yolks. Gradually add about 1/2 cup of the hot milk mixture to the egg yolks, whisking constantly to temper them.
- Pour the tempered egg yolk mixture back into the saucepan. Cook for another 2-3 minutes, stirring constantly, until the pudding thickens further.
- Remove from heat and stir in vanilla extract and butter until smooth. Allow the pudding to cool slightly.
- Layer the Pudding:
- In a trifle dish, casserole dish, or individual serving cups, start with a layer of vanilla wafers.
- Add a layer of sliced bananas, followed by a layer of pudding.
- Repeat the layers, finishing with a layer of pudding on top.
- Prepare the Whipped Cream Topping:
- In a chilled bowl, whip heavy cream, powdered sugar, and vanilla extract until stiff peaks form.
- Assemble and Garnish:
- Spread or pipe the whipped cream over the top layer of pudding. Garnish with crushed vanilla wafers or additional banana slices if desired.
- Chill and Serve:
- Cover and refrigerate for at least 4 hours, or until set. Serve chilled.
Notes
- To prevent bananas from browning, toss them lightly in lemon juice before layering.
- For a shortcut, use instant vanilla pudding mix instead of making the pudding from scratch.
- This dessert is best enjoyed within 1-2 days as the bananas may start to soften over time.
Keywords: Banana Pudding, classic dessert, layered pudding dessert, vanilla pudding recipe, banana dessert, creamy pudding, no-bake banana pudding, potluck dessert, comfort food dessert, vanilla wafers dessert

